Sunday, May 29, 2016

Mostly Homemade Veggie Spaghetti


So here's the thing. It's been pretty silent over here. And that's because I have spent the last month traveling in Costa Rica and then coming back home only to be wrapped up in interviewing for a promotion. So while we are going to get this fantastic spaghetti, I have an announcement first. 

But wait, I wanna show this before I tell you...
Here's one of my favorite shots from our trip.
Pure relaxation....


Anywhoo...during an entire 4 weeks+ away from blogging, I found myself in a daily practice of photography and writing that was all my own. No agenda. No audience. Just me and my imagination. And what I found is that it's time for a change. Long story short, this is the last post for Karen's Place. 

When I started this blog, I needed an outlet. I needed to practice photography. I needed to just do SOMETHING productive. And it has been the most amazing and fulfilling hobby. I have gained a newfound confidence in myself and a renewed commitment to my own dreams. 

This blog is no longer just about practice and food. It's about spreading a message of joy and good meals, because they are inextricably linked. And so now it's time to introduce my new blog, www.foodieuprising.com

My goal? 
To empower the every day person to get in the kitchen and make some flippin' REAL food, to take care of themselves, and to no longer make any excuses. Reinventing what it means to be a foodie, and what it looks like to fuel your dreams. Last, I'm out to encourage folks to live fantastically normal lives, one healthy step at a time.


Starting next week, all my recipes, fitness tips, and wellness writings will be found at foodieuprising.com. There's going to be a whole lot more focus on lifestyle and a whole lot more writing. It feels like a big step forward. And I am really going to miss Karen's Place. Thank you, readers, for being a part of it. So for today, let's celebrate with one of my new favorite meals. A veggie packed pasta that is easy to make for dinner and pack for lunch throughout the week. 


INGREDIENTS
  • Olive oil
  • 3 garlic cloves, minced
  • 2 serrano peppers, minced 
  • 2 medium white onion, finely chopped 
  • 4 small carrots, minced 
  • 2 cups crimini mushrooms, diced 
  • 1 zucchini, small, rough chopped 
  • 1 small yellow squash, rough chopped 
  • 15 oz marazano canned tomatoes
  • 1 jar good marinara sauce 
  • 2 fresh tomatoes, diced 
  • Salt, pepper, red pepper flakes, to taste 
  • Angel hair pasta 


DIRECTIONS
  • Boil quart of water and cook angel hair pasta according to package.
  • Heat oil, garlic, serrano in sauce pan over medium high heat
  • Saute for about 1 minute and then add onion and carrots ... 5-6 minutes
  • Add salt, pepper, and red pepper flakes. Stir! 
  • Add mushrooms, cook for another 3 minutes
  • Add zucchini and squash. Saute for another 10 minutes. 
  • Add canned tomatoes. Bring to boil and reduce to medium-low heat. Simmer for 10 minutes.
  • Pour in marinara. Simmer for another 15 minutes until thick. 


And there you go! One healthy, balanced meal. I love it! Stay tuned to foodieuprising.com for more awesome recipes like this one, fitness challenges, and wellness reflections! It has been such an amazing journey here at Karen's Place. Thank you, again, for being here. Here's to another climb! Be a part of the next hike. Bookmark and follow: foodieuprising.com

xx - karen 

Sunday, April 10, 2016

Charred Romaine with Pancetta + Honey Mustard Vinaigrette


It's not too often you meet someone that you can completely sync with in life and in work. Michelle is one of my very best friends and she is by-far my favorite person to work with and travel with. We met as co-workers, in a place that was a super tough environment. I remember being on her interview team and thinking to myself, "If she doesn't get hired, these people are making a huge mistake". Luckily, my voice was heard and she was hired. We spent over a year together, in each other's offices every day, working on copy and talking about the future. Without realizing, it seemed as though we were inseparable. And though our lives look very different today, we still have that #dreamteam vibe flowin' on the regular. 

Just yesterday, she came to my side of the water and we sat at the most Seattle-like pub I could find in Issaquah. (It was the Black Duck btw. If you haven't been there, go now!) We sat in the sun, caught up on life-happenings and started stirring-up new plans for the future. The drinks, the conversation, and the food were all equally fantastic. 


Do you follow me on Instagram yet? If not, you totally should. More of this goodness over @karenleannkirsch 

So, speaking of the FOOD, I decided to go for a salad at the restaurant since I had already eaten really heavy all day. (See previous post ... training for STP makes you hungry... like woah) And maybe you're thinking, "Well, that's boring". But let me tell you friend, it is NOT! I had grilled romaine. Yes, they put it on a grill and served it up with a honey mustard vinaigrette. It knocked my socks off. So much so, I was determined to recreate it today for my lunch. But, this time, I knew I needed some protein and my own flair to it. Also, I don't have a grill. So for this recipe, I used my cast iron grill pan and just charred it. 

Grab that pancetta and get cookin' folks. It's time for that silly salad of yours to get a HOT new makeover. (Ha, see what I did there?)


INGREDIENTS
for the salad:
  • 1 tsp olive oil
  • Cooking spray
  • 1/2 of Romaine head, sliced lengthwise 
  • 1 handfull cherry tomatoes 
  • 1/4 cup feta cheese 
  • 1/2 cup cooked pancetta 
  • 1/4 honey mustard vinaigrette (see below)
for the vinaigrette
  • Scant 1/2 cup olive oil
  • 1 clove garlic, sliced in half
  • 1/2 tablespoon coarse mustard (I used Mustard & Co. Dill & Garlic)
  • 1/2 tablespoon honey
  • 1.5 tablespoon white wine vinegar 
  • Salt & pepper to taste


DIRECTIONS 

for the salad:

Heat a saute pan over medium heat and cook the pancetta until golden brown. Drain on a plate with a paper towel. Next, slice the cherry tomatoes thinly, and do your best to get the seeds out. Cut your lettuce head in half. Be sure to keep the stem ON. You'll need it to keep the leaves together. Then, get your grill pan HOT and lightly spritz it cooking spray. 

Now, drizzle just a teaspoon or so of olive oil over the cut side of the Romaine. After about 30 seconds, give or take, of heating up your grill pan, place the Romaine on the grill cut-side down. Grill for 2 minutes and then flip it. Grill for another 2 minutes. Take the lettuce out of the pan and place it onto a large plate. It should look slightly brown and wilted, but full of color. Then all you need to do is top it with the pancetta, feta, tomatoes and dressing. 

for the dressing:

Rub 1 clove of garlic all around the sides of a medium bowl. Then discard it. Next, measure out the honey, mustard, oil, and vinegar. Dash in some salt and pepper. And then whisk it all together. You can also place all of the ingredients into a small jar and shake everything together. I like to do this for easy storage afterwards. 


AND BOOM! There you have it. A wonderfully warm salad for a spring day. Try it out and let me know what you think. 

As always, eat well! Be well!

xx,
Karen

Sunday, April 3, 2016

Ethan's Slow Cooker Ribs


Ethan and I just started training for the STP. In other speak, that means we are riding from Seattle, WA to Portland, OR on our bikes with about 15,000 other people. It's a classic ride that is about 200 miles long. You know that emoji face where its all like bug-eyed and its mouth is wide open? Yeah, that's what I picture in my head every time I am reminded that we are doing this in July...

So yesterday we took our first ride. Along with my good friend Andy and my dad, we rode around the perimeter of Mercer Island. That's only about 14 miles, so yes, we still have a long way to go. But for real, it felt so good. And I even beat the boys on most of the hills ... high five! Up top! By the end of the ride, I was spent. But so happy to be able to get out on the road again.

But let's be real, when you're training for any kind of competition, you get real HUNGRY! Knowing this, Ethan decided to take dinner into his own hands. Before we left for the island, he popped in some ribs into the SLOW COOKER. You heard me right. For those of us not lucky enough to own a grill, this is probably the BEST way to cook a rack of ribs. Like really. Just try it, you won't regret it. And you may find yourself eating ribs WAY more than you probably should. Because it's just too easy to make them this way..


INGREDIENTS
  • 3 pounds ribs
  • 1 onion, sliced into 8 wedges 
  • 3 cloves garlic
  • 2 tsp garlic powder 
  • 2 tsp salt 
  • 18 ounces Barbecue Sauce of choice (we use Stubbs)
DIRECTIONS
  • Combine ribs, onion, spices and sauce into slow cooker or crock pot. Save about 1/2 cup of the BBQ sauce!
  • Turn the knob to low and let everything cook for about 6 hours 
  • At the end of the 6 hours, preheat your oven to 400 degrees F
  • Once the 6 hours is up, line a baking sheet with foil and put the ribs + onions onto the sheet and cover everything with the previously saved BBQ sauce.
  • Finish the ribs in the oven, cook for about 20 minutes. 
  • Serve with a great salad or roasted veggies. You'll surely be stuffed!


Eat well! 
Be well!
Follow by email below!

xoxo,
Karen


Sunday, March 27, 2016

Kimchi Tofu Egg Fry


I've been running on one whirlwind after another. Between flying back and forth from the Southwest and fighting a weird flu-cold thing and THEN throwing a fantastic Sock Hop for the 100 families I work with, there hasn't been a whole lot of time for creativity on my plate. But, last weekend I had the house to myself and kimchi in the fridge. I knew I wanted to try something new. And I also knew I had to cook for only my self. It was time to take a chance. Get that fermented cabbage into a fry pan with some tofu and put some fried eggs on top. This recipe is surprising AND delicious. Get ready to treat your self. And yes, please say that in a tone that Donna would on Parks & Rec.


INGREDIENTS
  • 1/4 cup fried tofu
  • 1/4 cup kimchi
  • 1/2 tsp Chili powder
  • Dash of salt
  • 2 eggs
  • 1 tablespoon oil

DIRECTIONS
Slice a 1/2 inch slab of semi-firm tofu. Cut into cubes. Grab a medium-sized fry pan and heat 1/2 tablespoon oil over medium-high heat. Once hot enough, put the cubes of tofu into the pan, and let those babies fry! Season with chili powder and salt. 

Once the tofu starts to brown, get that kimchi into the pan. Stir fry for 4-5 minutes. You'll know everything is ready when the tofu is very firm and golden all over. Clear the pan.

Then put the other 1/2 tablespoon in the pan and heat over medium heat. Crack two eggs directly into the pan, and fry! Season with a dash of chili powder and salt. 

Layer the tofu and kimchi onto a plate and place the fried eggs on top. Serving with sriracha is recommended! 


Follow by email below!
Eat well! Be well!

xxoo,
Karen

Sunday, March 20, 2016

DIY Adult Ramen


I'm not going to lie. Today's entry is going to be pretty elemental, pretty old school, pretty throw-back to my college days. And yes, it does require going to the store and buying a $0.99 package of Top Ramen. BUT, before you judge, I caught whatever plague everyone else is getting. I've been so sick for the last week, its been taking all of my energy to even get out of bed in the morning. Really, the only thing that has been tasting good lately is ramen. It's a crazy sickness that's been affecting everyone I know, and so I hope this blog post finds you well! 

The thing is though, I've dressed up this ramen. I added REAL chicken, radishes, and mushrooms. I also did NOT use the sodium-bomb that is called the "spice packet". It's been boiled in chicken bouillon and I added an egg. So it's like a chicken noodle egg drop soup that's been dressed up with a hint of lime and sriracha. It's like your old college favorite ... but classier. 


Say what you will about this simple meal, it's filling and warm. Two things you need most when you're fighting a fever and have little energy. Let's get to it then, shall we?

INGREDIENTS

  • 1 Top Ramen Package
    (it really doesn't matter what flavor you have, you won't be using the spice packet any way)
  • 1/2 cup cooked, shredded chicken
  • 1/4 cup sliced radish
  • 1/4 cup sliced mushrooms (optional)
  • 1 egg
  • 2 cups water
  • 1 tablespoon bullion
    (dissolved in water ... you could also skip the water and the bullion and just use chicken stock instead!) 
  • 1-2 squeezes lime juice
  • 1 tablespoon sriracha 
DIRECTIONS
Bring two cups of water +  bullion or stock to a boil. Place the dried ramen noodles into the boiling water and cook for three minutes. At the end of those three minutes, crack the egg into the boiling pot. Quickly whisk the egg around until you see the yolk separate and firm up. Then, reduce the heat to medium-low and add the veggies, chicken, sriracha, and lime juice. Cook for 1 more minute, and then get ready to enjoy this easy noodle soup!


I'm starting to feel a little better, so get ready for those fancy recipes you're used to! 
Per usual, eat well! Be well! And really... don't get sick. It's the worst. 

xoxo,
Karen

Sunday, March 6, 2016

Flashback Food: Beach Fresh Oysters


THE FOLLOWING POST IS A LITTLE DIFFERENT :)
I wrote the beginnings of this story while recently attending a food writing workshop, led by Molly Wizenberg. I hope you find it entertaining, please let me know in the comments if you do!!
..............

Weekends are precious pockets of time, especially reserved to spend together. Usually it is the only time we have to really connect, and adventure (more importantly!). I learn the most from him when I'm outside my comfort zone. And this day was no different. 

We packed into his brother's car and headed towards the peninsula. I looked up and realized we were crossing the Tacoma Narrows Bridge. I secretly hate this bridge. My mind always flashes to this black and white image of the bridge rocking and rolling to the typical whipping wind known to plague the area. Right before the image fades, the bridge collapses into the cold sound below. 

So instead, I looked up at the arches and the rain dotted windshield to keep my mind occupied on something less morbid. 


I kept saying loud affirmations in my head to pump myself up, because soon I'd be on a beach gulping down my very first fresh oyster. And then I took a picture to post to Instagram. If the whole internet world knew that this about to happen, then I couldn't wuss out. 

We kept traveling, and the more we passed turnoffs that look reasonable enough to stop at, the more anxious I became. "Where are we going? Does he actually remember how to get there?" ... I get super judgmental when I'm nervous...

"I don't do things like this", I thought to myself, "He and I are so different. What is his family going to think of me?" And then we turned.

We finally get to the intended beach, the one he has been going to since he was very little. It's different than I expected. There are patches of grass and the parking lot feels like it's practically on top of the sand. As we wait for his parents, I start reading all of the warning signs posted around the lot. 

"LIMIT..."
"MARINE TOXINS..."
"DO NOT EAT..."
"PERMIT REQUIRED..."
"DANGER..."

Yikes. My mind immeadiately goes to the thoughtful advice of my grandmother, "Why dig it up yourself when someone else already has done it for you?" That's the kind of philosophy my family lives by. But me? NO. I'm going to do this. I'm going to be different. Let's get started before I run back to the car and lock the doors. 


Everyone is accounted for, I grab my blue Northface, and we head down to the grey, gritty beach. His parents set out deep buckets and short shovels, shuckers, and extra water. And then they sat down on the smallest stools I had ever seen. The scene is simple and quiet, but my insides are bursting loudly still with random thoughts and fears. I'm completely out of place. But before I can dwell in self-pity for too long, he hands me a shovel and points me to a mud puddle where we will start digging. Between the ocean air and the heavy lifting, I feel covered in salt. Though the rangers back at the parking lot told us that this year's harvest was lack luster, we were making a good haul. 

I must have lost track of time, because all of a sudden his uncle was looking at me. His eyes tell me, "It's time." He's holding three shucked, wiggly oysters and one of them is for me. Excited and disgusted, I hold the bumpy grey shell and stare at its pale, slimy insides. "BOTTOMS UP!", he said. I closed my eyes and let the animal slide down my throat. I did it, I made it. 


RECIPE FOR BEACH FRESH OYSTERS

INGREDIENTS

  • 1 awesome boyfriend + family
  • 1 beach with oysters planted (for Washingtonians, find a beach here)
  • 1 freshly dug up oyster, shucked
DIRECTIONS
Drive to the beach with shuckers, shovels, and courage in tow. Get out of the car and walk yourself to the beach, with the tools previously listed in hand. Find a puddle with a shell sticking out of it, and start digging. 

Clean the shell in a deep bucket of water. Grab your shucker and pop that baby open. Look at your boyfriend, close your eyes, and gulp it down. Oysters come freshly seasoned with salt water from the ocean. 

Enjoy!


Follow by email below, and never miss a beat :) 
More stories like this to come!

xx,
Karen


Sunday, February 28, 2016

The Monte Cristo


Last night, Ethan and I went to the ale house across the street with Joe & Devin. A couple that we love. Gosh, they're great. It's so hard to make friends after college, let alone couples. Yay for double dates that don't suck! Anyway, after some beer, Joe ordered a Monte Cristo for dinner. Oh man Joe, what a good choice. How come I never think to order that? We reveled in his choice for a beat, and then Ethan spoke up. He didn't know what Joe was eating. 

Cue cheesy double take.... "WHAAA?"

So we explained. It's a ham & cheese sandwich, fried french toast style, and topped sweetly with powdered sugar and jam. He was with us in our excitement until we got to the "sweet toppings" part. 

Cue cheesy double take.... "WHAAA?"


It made me think of my first MC. I was with my mom (whom I call MAAAAAAAmmmmm) at the Issaquah Cafe (great local diner, check them out). She ordered it, I was curiously wary. I tried it, and BOOM. My eyes and tastebuds were opened to a whole new world. 


After our dinner with Joe and Devin, I knew I had to make it for Ethan. And according to him, a Monte Cristo is like the best parts of breakfast for dinner without sacrificing the dinner part. As of this morning, he's still weirded out by the sweet and savory combo. But that's what makes this sandwich great. Embrace the weird, folks. 
Embrace   the   weird.


INGREDIENTS
  • 2 pieces of bread (I used Essential Baking Co Multi Grain) 
  • 1 tablespoon greek yogurt (or mayo)
  • 1 tablespoon mustard (I buy Mustard & Co ... so good)
  • 6 slices fresh ham
  • 1/2 cup grated Gruyere Cheese 
  • 2 eggs
  • Splash of milk
  • 1 tablespoon butter
  • Salt & Pepper
  • Honey, jam, and/or powdered sugar for topping 


DIRECTIONS
In a shallow bowl, crack 2 eggs and add a splash of milk, a couple grinds of pepper, and a few dashes of salt. Now, if you accidentally drop your pepper container in the bowl, pick it up, dry it off, and keep moving. You gotta whisk all those ingredients together!

Get two pieces of bread and spread the yogurt and mustard on one side of both. Put the cheese on piece and the ham on the other. Smoosh the bread together and then proceed to dredge it in the egg wash. 

Heat butter over medium heat in a large pan. Once the pan has heated and after dredging the sandwich on both sides, put the sandwich in the pan. Fry on both sides (about 3 minutes per side). 

Serve with raw honey, fresh jam, and/or top with powdered sugar. And enjoy! Enjoy the weird! It's delicious. 


As always, eat well! Be well! 
And follow by email below to never miss a beat!

xoxo,
Karen

Sunday, February 21, 2016

Breakfast Fried Rice


A couple weeks ago I woke up inspired. I had less than an hour to get ready for work, but I just NEEDED a fresh, fun, filling new breakfast. I looked into my fridge. I usually dread this ritual because my fridge is not always the most cohesive and useful tool in my kitchen. Ha, that's some truth for you right there. Something that I always need to work on is details. It takes a lot of patience and willingness to see the bigger picture when you're setting up your fridge. Have you washed, sliced, prepped your fresh fruits and veggies? Did you cook your grains ahead of time?

It's a lot of work. Work that I usually don't have time for, or at least don't make time for. 

But that morning a couple of weeks ago, the stars aligned and I had just the right combo of items already prepared to have that fresh, fun, filling new breakfast. So there I was in my PJs, with ten minutes left to go until I needed to be in the car headed to work, taking pictures of this awesome breakfast on our deck. I just had to share it with you. 

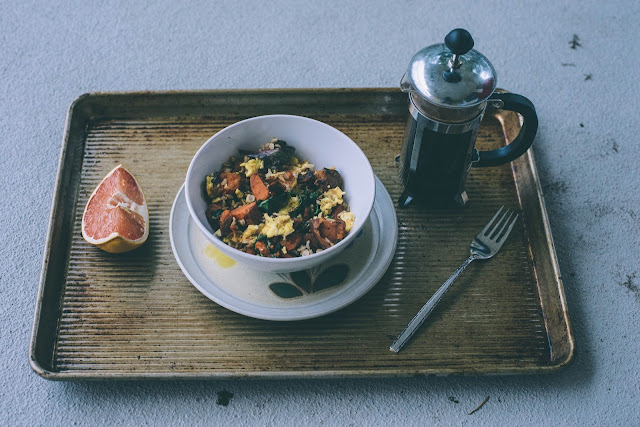
It's fried rice with 2 eggs instead of just 1, wilted greens and roasted sweet potato. And I mean, wow, I can't wait to have it again.


INGREDIENTS
  • 1 tablespoon olive oil
  • 1 clove garlic, minced
  • Salt & Pepper to taste 
  • 1 cup roasted sweet potato, sliced into small chunks
  • 1/2 cup brown rice, cooked
  • 1 handful greens (about 1 cup)
  • 2 eggs, scrambled 
  • Feta cheese for topping, optional
  • Hot sauce for topping, optional

DIRECTIONS

Start with a large pan and heat the olive oil and garlic over medium-high heat. After about 1 minute. Dump the sweet potatoes into the pan and begin to stir fry. To learn how to roast the sweet potatoes, click here. Cook for about 5 minutes. 

Next, add the rice to the pan. Cook for another 2 minutes and then add the greens. Add some salt and pepper to your liking. Once you see the greens wilting, push everything to the side. Whisk the eggs and add them to the newly cleared space in the pan. Scrape the eggs back and forth on the pan until the set. 

Once the eggs are set, combine everything. Cook for just a little while longer until the eggs show a little brown-ness. Get a bowl out, top with fresh radish, hot sauce, feta. Serve with fresh fruit and fresh coffee. Now breathe in the morning and know you've done something good for yourself. 

Enjoy!
And remember, sometimes that extra effort is totally worth it.


xoxo,
Karen

Tuesday, February 16, 2016

Hello, from Texas

Warning, not a normal post!
I just got home, but wanted to share where I was this weekend :)
Stay tuned for a fantastic breakfast  next week!


Instead of the usual romantic Valentines weekend I would normally have with Ethan, I pushed plans back and went to Texas with one of my best friends. "That's different", you say? "BRILLIANT", I say. When do you really get a chance anymore to spend uninterrupted time with your best friend anymore? For four days no less!


We ate, we drank, walked from one side of Austin to the other, we yoga'd, we uber'd. And then we did it all again. It was simple, straight forward, and a complete blast. I left that city with a renewed sense of self, and even more hope for the love I have yet to experience in my life to come. And the best of it all, I experienced breakfast tacos for the first time. Ha, get ready for that post soon. 


Anyway, I encourage you to go for an adventure with your best friend some time soon. It'll test you, remind you, and enlighten you. There's more to celebrate during Valentines than just romance. Pick up the phone, and get ready to be humbly inspired. 

xoxo,
Karen

(See you Sunday for our next FOOD post!)

Monday, February 8, 2016

The Lost Recipe Files: A Greek Cheese Tart

Most weekends I wake up late, let the light stream in from the dark floor to ceiling curtains my landlord picked out, and just let the next two days happen without much plan or thought. This last weekend, however, was much different. I woke up early and jammed the last two days chalk full of learning to fill me up, motivate me to make progress on the blog, and, more importantly, connect with other beautiful like-minded people. I was at The Pantry, a cooking school in Ballard, where I spent two days with Molly of the world-renowned Orangette Blog. Please check out this wonderful human being right now. 

We sat at a long butcher block table and wrote stories of our past and of memorable food. Molly encouraged us to bring out rich, concrete imagery and human emotion to our food writing. And we practiced over and over again, letting pencil hit the page and letting our fears go. I feel like I have uncovered a voice within me that I had been buried a long time ago. So, I hope you all are ready for some deeper and richer stories ahead.

Since I was so busy at the butcher block table this weekend, along with a great baby shower for my sister and a Super Bowl Party, I didn't have time to prepare a fantastic dish for you this week. And I also just realized that this blog has been active for over a year! As you can imagine, I have had many ups and downs in the kitchen this year, failed recipes and tears over a huge dumping of cinnamon in a Mexican meal that should have been chili powder. So I took stroll down memory lane and looked through my own personal archives, not knowing exactly what I would find. And then I came across a recipe that I never posted! 

Meet the Greek Cheese Tart. I think I made this last spring and it totally surprised me. I'm not sure why I never posted it, because it is delicious. It's a lighter and fluffier version of the cheesecake and the crust is phyllo dough that puffs up around the sweet insides like a flavor pillow. Here are the details...


INGREIDENTS:

  • 1 package phyllo dough (find it in the fridge section of your grocery store)
  • 4 large eggs
  • 1/4 cup white sugar
  • 1 tablespoon flour
  • 2.5 cups ricotta cheese 
  • 4 tablespoons thyme scented honey (plain works too!)
  • 1.5 teaspoons cinnamon (plus a little more for dusting on top) 

DIRECTIONS:

Let your phyllo dough sit in the fridge while you prep the filling. You'll need a springform pan that you've buttered the sides of when you're ready to assembly everything. Preheat your oven to 350 degrees F. 

For the filling, beat eggs in a bowl, add sugar and flour and then beat together until fluffy in texture. Next, add the cheese, honey, and cinnamon. Mix well. 

Roll out the phyllo dough on a floured surface and line the 10 inch round spring form pan. Let the extras hang down around the pan, you'll wrap the tart in these extras once the filling is in. Once the dough is set in the pan, pour in the cheese mixture. 

Bake for 50-60 minutes on a baking sheet. Remove the tart from the oven and sprinkle more cinnamon on top (while it's still hot). 

Makes a super great, sweet breakfast. I hope you have enjoyed this edition of the lost recipe files.....And thank you for a wonderful year. Here's to many more, cheers!

Eat well! Be Well!
Karen

Sunday, January 31, 2016

Spinach Mushroom Omelet [ 4 Mom ]


Last week I got a call from my mom. It had been raining, and she was running to the car. Long story short, she fractured her leg in THREE PLACES! Now, she is stuck elevating her leg and catching up on cooking shows. Even though her and I love slow mornings watching the Cooking Channel, we both share the need to be on the move. To help distract her, I decided to come over and cook her a surprise breakfast. Luckily, her pain level was down a little and she could enjoy the omelet I made. I knew she needed something fresh, filling, and flavorful. So grab some butter, some eggs, crimini mushrooms, and spinach. (Yes, I am in LOVE with mushrooms now...!)


Let's get down to business. Grab two saute pans, a medium bowl, whisk, cutting board, and sharp knife. The trick to cooking GREAT eggs is to keep things simple. Cook your veggies separately before adding in. Keep the heat low, and use lots of butter. And because we are making an omelet, don't move the eggs around too much. You ready? I am!


Spinach Mushroom Omelet
INGREDIENTS
  • 2 tablespoons butter
  • 3 large eggs
  • 1 large handful spinach, roughly chopped 
  • 1 cup crimini mushrooms, roughly chopped 
  • 1/4 cup grated parmesan cheese (optional)
  • Salt and pepper to taste
DIRECTIONS
  1. Crack three eggs into a medium bowl and whisk vigorously. You want them to look a little foamy. Set aside.
  2. Roughly chop spinach and mushrooms. 
  3. Grab one saute pan and heat 1 tablespoon butter over medium heat. Once melted, add mushrooms and a pinch of salt and pepper. Saute and stir for about 5 minutes. Add spinach, saute until just wilted. Turn heat to low.
  4. Grab the other saute pan and heat another tablespoon of butter over medium-high heat. When the butter stops sizzling, then you know it's time for the eggs. 
  5. Add the eggs and swirl the pan so they coat the bottom. Let them cook on medium low. Once the eggs look set (about 4 minutes), use a spatula to loosen the eggs from side of the pan. Then use a flipper and flip the omelet! Cook for 1 more minute (add cheese at this point if you want!) Note: if you do not want to flip the eggs, check out the Kitchn for different technique. 
  6. Add the veggies and fold the sides of the eggs inwards. 
  7. Take off the pan and serve!


Hope this brightens your day. I'm pretty sure it brightened my mom's (and mine)!
Enjoy and follow by email below :)
xoxo - karen

Sunday, January 24, 2016

Chloe's Hipster Brunch Bowl


Mercury is in retrograde. I have no idea what that means. But I can say with great certainty I know how it feels now. Everything, literally everything ... and everyone ... in my life is off. Here is a quick check list from the last two weeks (not comprehensive):
  • I lost the ring my grandparents gave to me for my 16th birthday
  • I smacked my head twice within a matter of minutes while entering the gym
  • The expensive amazon package I ordered got stolen ... or lost ... or something
  • My mom broke her leg
  • Don't even get me started about work ...the people...the kids...the drama...
  • And then there is my brilliant friend Chloe. A genius in the kitchen, has lost her ability to bake... trust me, that's a BIG deal. She is LITERALLY a genius. 
According to galadarling.com, everything in our lives are out of whack is because Mercury is in retrograde. And, "It's because Mercury rules communication, clear thinking, truth and travel, so when the planet goes retrograde — which means that it looks like it's going backwards in the sky — all those things go backwards. They start to get ugly and tangle up". I'm going to call truth on this one. But luckily, things are starting to look up again and it sound like Mercury is going back to doing its job. I hope you find the same is true for you in the coming week!

So, let's meet Chloe:


She's part biostatistician, part whiz kid in the kitchen. She was my neighbor in college, and a forever dear friend. I always look forward to going over to her house. It's straight out of a West Elm magazine. There's a place for everything, and its beautifully adult and adorable. I'm obsessed. Apparently, for the last two weeks, everything she has tried to bake has turned out wrong. That doesn't happen to her. I was floored to hear her mishaps and frustration. 

See? GENIUS 
Anyway, then she pulled out this large bowl of greens and starting to put together our brunch. I quickly realized her mishaps definitely hadn't spilled over to her cooking skills ... and most likely her baking skills will rapidly return. JUST LOOK AT THIS TABLE, PEOPLE! Everything you see was made by her, including the bread. 

......................#goals


So let's take a closer look at the huge bowl of goodness. We enjoyed it on a rainy Saturday morning with pour over coffee, and asked Chloe what the creation was called. "The Hipster Brunch Bowl", she said. And yes, it was practically perfect in every way. 


CHLOE'S HIPSTER BRUNCH BOWL
*note: Chloe didn't measure much, because cooking is not an exact science. Mix and match with ingredients that you like most! 

INGREDIENTS
  • 0.5 pound arugula
  • 0.5 pound red leaf butter lettuce
  • 2 cups roasted sweet potato 
  • 1 cup roasted fennel 
  • 2 cups roasted brussel sprouts 
  • 2 cups roasted cremini mushrooms 
  • 4 sliced Easter Egg radishes 
  • 0.5 cup pickled red onion 
  • 4 soft boiled eggs
  • 2 cups crispy-skinned slow roasted pork belly
  • Parsley dressing (see directions below)


DIRECTIONS:
  • Make a bed of lettuce and arugula in the biggest bowl you have.
  • For the roasted veggies, you need very large baking sheets and parchment paper. Slice up the veggies, toss in olive oil and salt, and bake at 425 degrees F for about 25 minutes. They need to be brown and a little crispy. 
  • For the roasted pork belly, check out this resource
  • For the soft boiled eggs, boil the eggs for 2-3 minutes and put directly into ice bath. Let sit for 4-5 minutes. Peel and slice in half. 
  • Slice up the easter egg radishes, thinly 
  • For the pickled red onion, check out this resource
  • Layer veggies and meat on top of the lettuce into quadrants and top with parsley dressing (see below!)

    For the Parsley Dressing 
  • Heat a little olive oil in a saute pan and add...
    • dried oregano
    • thinly sliced garlic (2 cloves)
    • zest from 1 lemon
    • 1/2 tsp red pepper flakes
    • 1 tsp anchovy paste 
  • Cook over medium low heat until garlic is golden. Let it cool.
  • NEXT... Add the oil+goodies to food processor with....
    • 2 bunches parsley 
    • handful toasted walnuts
    • 1 spoonful dijon mustard 
    • 1/4 cup lemon juice
    • 2 tsp apple cider vinegar 
    • dash salt
    • dash black pepper
    • water to thin

I had a blast catching up with Chloe, and an equally awesome time spending brunch with her enjoying this delicious food. I look forward to it becoming a staple in my future weekend mornings. Thanks for hanging out Chloe, you are amazing in the kitchen, no matter what. 

Here's to no more baking mishaps!
Goodbye Mercury Retrograde!
Cheers!


xx,
Karen

p.s. follow by email below to get each week's post straight to your inbox!

Monday, January 18, 2016

College Orzo Salad


Like most in college, I didn't know my way around a kitchen and I definitely didn't have the money to do anything about that. But I did know I liked pasta and I was trying to eat healthy. Not really easy to do on a tight budget. But I did my best and it helped me discover my creative side in the kitchen. That's how this orzo salad came to be. I needed something cheap, filling, and wholesome. My dorm room became the place for my friends to escape a little from all the demands of school. I'd make this easy salad and we would forget that we weren't at home. Those simple dinners turned into long nights chatting and dreaming, and then finally, without realizing it, we had created a new home together. It's silly for pasta to mean this much, but then why does it taste so delicious?


Back in the day with two crazy fellas
Anyway, throughout all these years, I still make this salad. It's great for a light dinner and can do double duty as a filling lunch the next day. But I decided it was time to "ADULT UP" if you know what I mean. It used to be a very simple salad, not a whole lot of flavor ... just straight forward and simple. But it needed more .... so I gave it more. Now it's a complete meal in one bowl with a kick of flavor and spice to boot. So, let's go for it! 


INGREDIENTS:
  • 2.5 cups cooked orzo
  • 5 ounces spinach, julienned
  • 1 tablespoon olive oil
  • 1 garlic cloves, minced
  • Two 18 ounce jarred, diced tomatoes (find it at Whole Foods ... canned works too)
  • 1/4 fresh basil, chopped
  • 1/4 cup capers 
  • 4 links chicken sausage 
  • Salt, pepper, chili flakes (to taste)
  • 1.5 cups feta cheese 


DIRECTIONS:
  1. Heat a quart of salted water, and bring to boil. Add the orzo and cook for 9 minutes. Drain and toss with a dash of olive oil to prevent sticking.
  2. In a large sauce pan, heat olive oil and garlic over medium high heat for about 1 minute. Add the jarred tomatoes and bring to a boil. Stir in salt, pepper, chili flakes and basil. Turn the heat to medium-low and simmer for 15 minutes. 
  3. Cook your chicken sausage according to the package and slice. I like to bake mine.
  4. Add the spinach and sausage to your tomato mixture and then turn off the heat once fully combined. You don't want the spinach to get too wilted. 
  5. Grab a big bowl and combine the tomato sauce and orzo. Once combined, toss in the feta cheese. 
Enjoy! Follow by email below to never miss a beat with Karen's place :)