Friday, July 10, 2015

Farm Fresh Blueberry Cardamom Galette

Last weekend, I went to my very first U-Pick Blueberry farm. Ethan's parents took us out to North Bend for the opening day. We got there early, and found that we were not alone in our plans! People poured into the fields with buckets, sun hats, and hilarious conversations to eavesdrop on between the rows of berries. 

We were in the shadow of Mt. Si, and after months of going a million miles an hour in the city, I felt relaxed and clear. 


I had never really experienced anything quite like picking your own food before. While U-Pick is really fun, it's a lot of hard work! I was hot, distracted, and my back started hurting. It made me really start thinking about the folks who provide us fresh berries and produce every day. I'm not sure what would motivate someone to stand out in the hot sun every day, but I do know that we don't support our farmers and their workers enough. 


46 pounds of blueberries later. It was time to play in the creek to cool off, get back home, clean the berries, and split them up between us all. We freezed some and kept some fresh and uncleaned for eating and baking with during the week. 


For Ethan and his family picking berries is a summer tradition that lasts all year!


So, since we had a bazillion berries at our finger tips, it was time to start baking. I've been reading a lot of food magazines lately, and I have to say, if you have never invested in some of these I would! Fine Cooking, Cooking Light, America's Test Kitchen, Food & Wine, are just some of sophisticated resources that have a lot to teach you! The thing about food blogs - including mine - is that you never quite know what you're getting into. This blog is my way of reflection, connecting to my friends, practicing my art, and exploring a new career path. I am not a professional recipe curator (at least not yet!). But these magazines have rigorously tested their recipes, know the best tools, and can help you learn how best to prepare meals. 

Now enter this blueberry cardamom galette, inspired by Fine Cooking and adapted by myself slightly for an added punch ... because, well, cardamom. 


Blueberry Cardamom Galette Adapted from Fine Cooking

Ingredients for the dough:
  • 6-3/4 oz. (1-1/2 cups) unbleached all-purpose flour
  • 2 tsp. granulated sugar
  • 1/2 tsp. table salt
  • 5-1/2 oz. (11 Tbs.) cold, unsalted butter
  • 1 large egg yolk
  • 3 Tbs. whole milk
  • 1/4 tsp cinnamon
  • 1/4 tsp cardamom

Ingredients for the filling:
  • 4 cups blueberries
  • 1/4 cup granulated sugar
  • 2 Tbs. honey
  • 1 tsp. finely grated lemon zest
  • 1 tsp cardamom
  • 1/4 tsp cinnamon
  • 1 Tbs. all-purpose flour
  • Big pinch table salt
  • 1 large egg, beaten well
  • 2 Tbs. granulated sugar

Directions for the dough:
  • Combine the flour, sugar, and salt in a stand mixer fitted with a paddle attachment 
  • Cut the cold butter into 1/2-inch cubes and add them to the flour. 
  • On a low speed, mix the butter and flour until the flour is no longer white and holds together when you clump it with your fingers, this will take 1 to 2 minutes. 
  • In another bowl, mix the egg yolk and milk and then add that to the flour mixture. 
  • On low speed, mix until the dough just comes together
  • Knead the dough on a clean counter working it with the heel of your hand
  •  Wrap the dough in a sheet of plastic wrap as a flat disk, and let it rest in the refrigerator for 15 to 20 minutes (or up to four days) before rolling it out.
  • Before rolling it out, make sure you get the filling ready!

Directions for the filling:

  • Preheat the oven to 350 degrees F and line a baking sheet with parchment
  • Put the blueberries in a large bowl. Toss the fruit with the 1/4 cup granulated sugar and spices.  Add the lemon zest, honey, flour and salt, and toss 

Now it's time to combine and bake:

  • Remove the dough from the refrigerator and let it sit at room temperature for about 5 minutes. Roll the dough out and place on the baking sheet.  
  • Spoon the fruit in the center of the dough round. 
  • Using your fingertips, fold the edges of the dough over some of the fruit to create a rim about 2 inches wide. Work your way all around, pleating the dough as you go.
  • Using a pastry brush or spoon, cover the dough evenly with the beaten egg. Sprinkle the granulated sugar directly on the dough and fruit.
  • Bake the free form pie for 55 minutes, cool completely and serve at room temperature 
And there you have it! A beautifully rustic Blueberry Galette 

Keep enjoying the summer sun everyone! And get yourself to a U-Pick farm ASAP,  you won't regret it. Eat well! Be well! And subscribe below to never miss a beat :)

Thursday, July 2, 2015

Serene's Owl Cake

Hello! This week I am going to do something a little different. Instead of giving you a recipe, I'm going to give you a step by step tutorial on how to make your very own, owl cake:


SUPER ADORABLE, RIGHT? If you have the patience or a super creative cake making friend, this is an amazingly straight forward project in the kitchen. 

Enter my friend Serene:


She has been creating crazy cakes since her senior year of high school and it's a hobby that has just sort of stuck. I was her resident advisor in college - she was the kind of resident that kept me sane. Not only is she super cool, she was always down to hang out with me and watch stupid movies. We became good friends, and I always look forward to seeing her. After a recent facebook post where she showed off some wicked cactus cupcakes, I knew that we needed to see each other again. Serene is a project engineer by day and cake master by night. Let's see her process! 

I'll include links to the recipes she used for this below, but for now, prepare yourself to see some bakery magic!


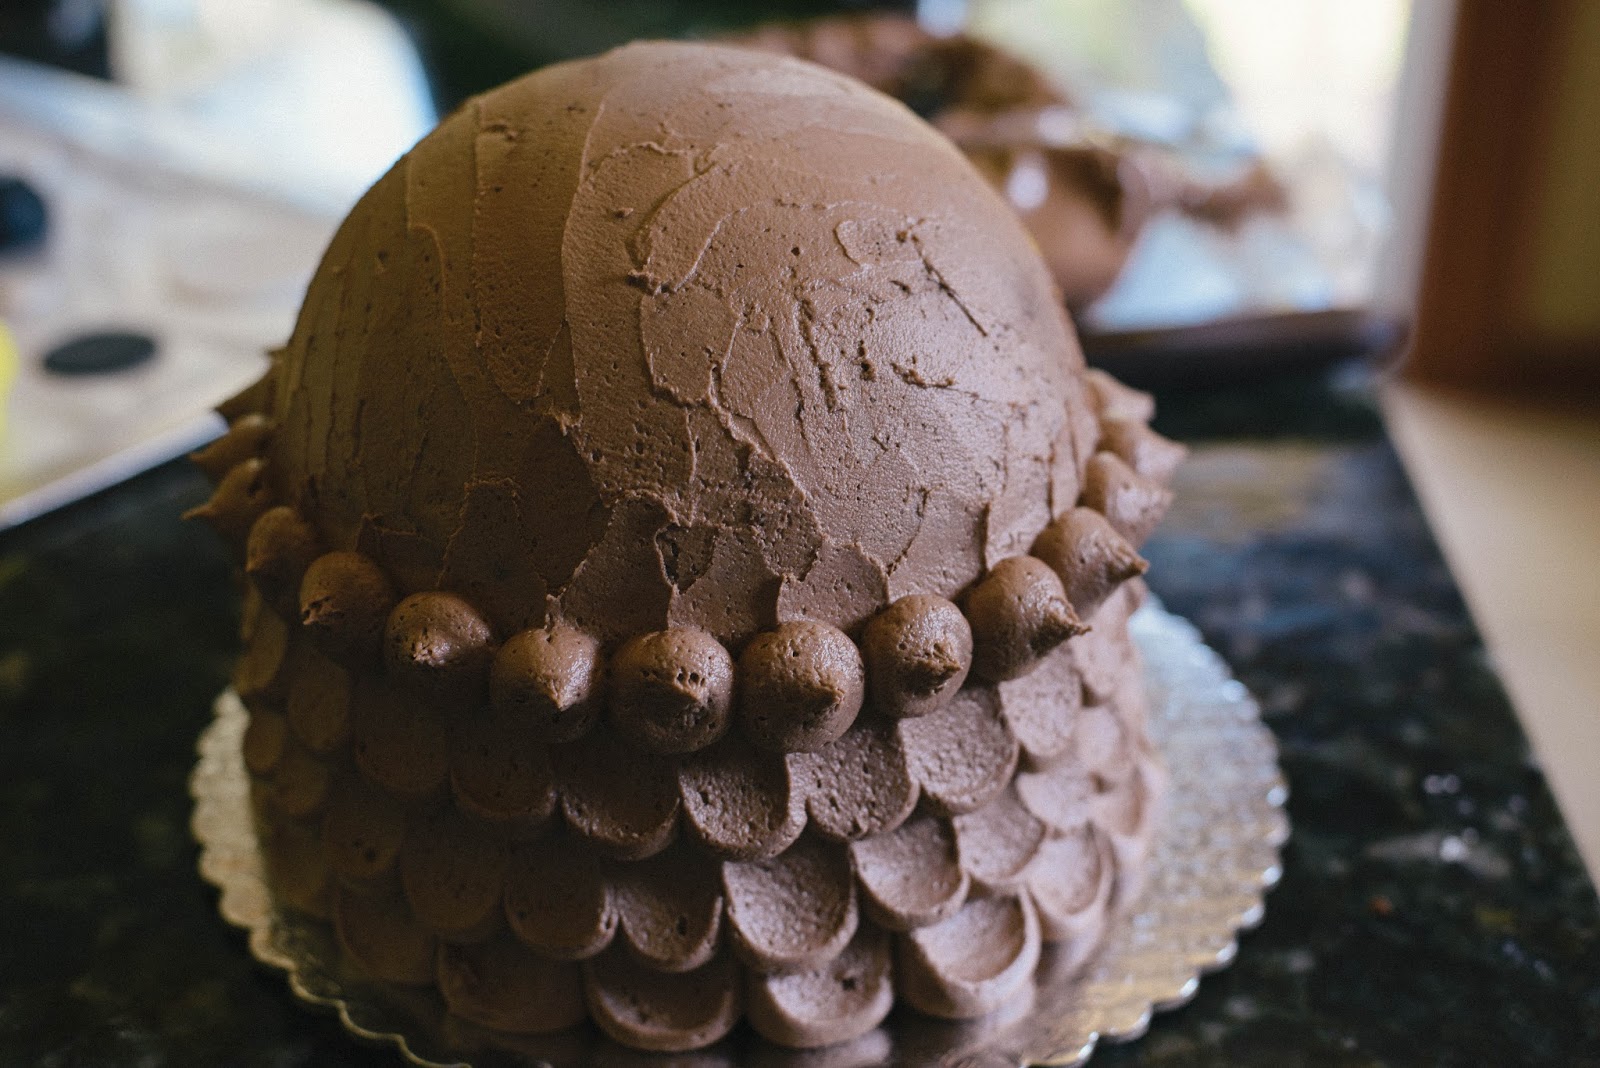
Step 1: Make the 2 round cakes and 1 dome shaped cake the night before and let it cool


Two round cakes will stack on top of each other (with frosting in the middle)
The dome shaped cake will be the top (for the head of course!)

Step 2: Make the peanut butter whipped cream frosting for the middle of the cakes


Step 3: Stack the cakes using the peanut butter frosting and add chocolate chunks for flavor


Step 4: Trim the edges to make everything even and make sure you have a cardboard cake stand that is the same size too


Step 5: Make the peanut butter buttercream frosting for the outside and dye it brown, since owls are brown you know..

`


Step 6: Frost the crumb layer! This means cover the cakes lightly and seal in all the crumbs. The next step will make it prettier.


Step 7: Grab the fondant, make three balls, dye them, roll them out, and using a cookie cutter make the circles for the feathers and eyes.


Step 8: Assemble the circles onto the front of the cakes to create the feathers


Step 9: Frost the cake! Make individual dots and using a flat knife, swipe up


Step 10: Add the eyes!


Step 11: Using your leftover fondant, make the beak and feet


AND THERE YOU GO! YOUR VERY OWN OWL CAKE!


SERENE'S LINKS:


For the buttercream: 
http://joyfullyhome.com/2014/04/owl-cake-tutorial/

For the whipped cream frosting: http://divascancook.com/peanut-butter-cake-recipe-peanut-butter-frosting-easy/  

For the full OWL tutorial: http://joyfullyhome.com/2014/04/owl-cake-tutorial/


Eat well! Be well! And subscribe below for more food adventures from me and my friends :)

Monday, June 22, 2015

Samosas + Mint Chutney

Some people come into your life and spark your sense of wanderlust. Enter Laurel - my world traveling friend. She is taking a gap year to take on the world and see what's next. After two years working as a manufacturing engineer in Arizona, Laurel has been wondering around South East Asia since December getting to know new people and volunteering in various cities. She's stayed in hostels, in homes with families, and along trails while trekking her heart out. 

She was in Nepal in May when the earthquake hit, and she then decided to make room for trained volunteers to help out and regroup. So for Mother's Day, she used her travel insurance, hopped a plane and surprised her mom by coming home for the summer. While she is home, she is catching up with her family and friends and making plans for the next part of her journey to South America.

She came over one night to visit with me and Ethan. After hearing about all the good food she experienced, we got motivated and decided to make Samosas! 


Samosas are a popular entree appetizer or snack in the local cuisines of Indian subcontinent, Southeast Asia, Central Asia and Southwest Asia, the Arabian Peninsula, the Mediterranean, the Horn of Africa and North Africa. They are a fried or baked pastry that are usually filled spiced potatoes, lentils, onions, peas, and or minced meat. 

It's a labor intensive process to make these tasty bites, but grab a few of your closest friends and you'll feel like you're having a party! Pair it with this minty chutney, too and you'll find yourself transported to a different continent. 

Check out more of Laurel's adventures here. And read on for the recipe! 

SAMOSAS and MINT CHUTNEY- INGREDIENTS

For the beef filling:
  • 2 pounds ground beef
  • 1 onion, finely diced
  • 1 lemon, juiced
  • 1 tsp + 1 tablespoon cumin
  • 1 tsp coriander powder
  • 1 tsp garam masala
  • 1 tsp tumeric powder
  • 1 bunch fresh coriander (if you can find it!)
  • 1 tsp garlic paste
  • 1 tsp ginger paste
  • 4 oz canned green chiles
  • Salt to taste 

For the wraps:
  • It's probably best to buy pre-made wraps, but you can make your own too
  • 3 cups flour
  • 2 tsp salt
  • 1 cup water
  • Vegetable oil for frying
For the mint chutney: 
  • 1.5 cups chopped cilantro
  • 1.5 cups fresh mint, chopped
  • 1 green chile pepper
  • 1/2 tsp salt
  • 1 medium onion, chopped
  • 1 tablespoon lemon juice
  • 1/4 cup water

DIRECTIONS
  • In a big bowl combine the ground beef, onion, chiles, ginger, garlic, the spices, half of the coriander and lemon juice. Make sure the ground beef is very lean. 
  • Heat 1 tablespoon oil in a large pan over medium heat and cook the beef mixture until completely browned and dry. Stir it constantly so you don't make lumps. It should look something like this.
  • While making the beef, get a couple other people on wrap duty.
  • For the wraps: combine all the ingredients and knead until the ball is really firm. Cover and let it rise for about 15 minutes. Then divide it into 6ish equal balls. 
  • Roll out the balls into a thin dinner plate sized circle. 
  • Once the meat is ready, get the individual wraps and shape them into a cone. Fill the cones with the meat mixture. 
  • Get a dutch oven or deep soup pan and fill it with 1.5 cups vegetable oil over medium high heat. 
  • Then, with the filled wraps get them in the oil!
  • Fry them on each side for about 5 minutes. When cooked, place on paper towel to drain and cool.
  • For the mint chutney: combine all the ingredients in a blender and puree! 


AND ENJOY :)


And per usual, eat well! Be well! And subscribe below by email to never miss a beat. 

Tuesday, June 9, 2015

Chicken + Quinoa Stuffed Peppers (plus bonus drink recipe!)

In college, I had terrible luck with my first and only roommate. She was super nice, don't get me wrong! And clean. And quiet. But she also went home every weekend, had one specific friend, and was never around. I had high hopes of gaining a new best friend when I moved in. Little did I know the real world had much more to offer me. Though my first roommate wasn't any trouble, she wasn't my best friend. And I needed some of those. 

Luckily I met Maia! She lived right next door and introduced me to more girls on our floor. Though we got really busy and did not spend as much time together as we hoped, our friendship has stayed strong. After graduating with her masters in nutrition, Maia and I have been dying to hang out more. It wasn't until last week that we ran into each other at a wedding for our mutual friends that we made firm plans. 


Stuffed Peppers. Next weekend. Bring the wine. 


Oh my, what luck! I had almost forgotten how much fun she is to hang out with. (NOT!) She lives on an old military base on an island with great light. And has a knack for going off recipe when she cooks. You heard me right (Curtiss!). While we cooked in her kitchen, I also made new friends: her master-bartender roommate, John and her well-storied boyfriend Curtiss. 

I had a blast cooking with Maia, and to bless our efforts John made us a unique cocktail. So from our kitchen to yours, with a bonus recipe at the end.......


Here's our Chicken & Quinoa Stuffed Peppers
(with help from Food52 + Maia's twists...and one idea of my own).


INGREDIENTS
  • 5 peppers, tops cut off and insides cleaned out
  • 1/2 tablespoon avocado oil (regular olive oil would work well too)
  • 3 cloves garlic, minced 
  • 1 pound chicken breast, diced
  • 1/2 teaspoon pepper
  • 1/2 teaspoon salt
  • 1 teaspoon chili powder
  • 1/2 teaspoon cumin
  • Dash of paprika 
  • 3/4 cup shredded carrots
  • 1/2 tomatoes, diced
  • 3/4 cup parmesan cheese
  • 1 cup quinoa, cooked
  • 1/2 cup mushrooms, chopped
  • 1/2 cup onion, chopped
  • 1/2 cup Rose wine.... that was my idea


DIRECTIONS
  • Preheat the oven to 400 Degrees F
  • Heat 1/2 TB Avocado Oil in a Sauté Pan on a medium. Wait a minute. Then, add the onion, the mushrooms, and garlic and cook for 2-3 minutes. And hey, if you don't like mushrooms, you can leave them out. But they are pretty darn good in it!
  • Next add in the chicken and put in all the seasonings (pepper, salt, chili powder, paprika, cumin, and anything else you think would be good.)
  • Stir every so often and cook until the chicken is done. No pink!! Just pale. Once the chicken looks almost cooked, add in a 1/2 cup of your wine (Rose or White will do). Let it cook a little more (1-2 minutes).
  • Then add in the shredded carrots (use a cheese grater) and tomatoes. Cook for about 5 minutes more.
  • Turn off the heat and add in the parmesan cheese and quinoa.
  • Make sure you have gutted your peppers and that they are ready to stuff. Are they stuffable? Okay, take your mixture and stuff them!
  • Get them into a baking pan that will keep these peppers standing upright. Maia and I used a couple of small loaf pans that worked well. Cover them with foil and bake for 20 minutes. 
  • After 20 minutes, take the foil off, turn the oven to broil, and cook for 5 minutes more. You want to crisp the top!
  • To eat, get a sharp knife and cut the pepper in half. Everything stays together pretty well after that... and enjoy!

With this lovely cocktail...


John Archibald's Mercer Island Sunset


INGREDIENTS:
note: yields two drinks
  • 2 shots whiskey
  • 1 shot sweet vermouth
  • 1/2 shot cointreau 
  • Dash Regan's Orange Bitters
  • Dash Arch's Orange Bitters**
  • Garnish with raspberries or cherries
**Arch's Orange Bitters were made in-house by John Archibald himself. We will have to contact him later to see if he will let us in on that recipe. Any orange bitters will do, maybe....


Per usual my friends, eat well! Be well! And subscribe in the "subscribe by email" box below to never miss a beat!


    Monday, June 1, 2015

    Chicken Cesar Pasta Salad

    Like I mentioned in my post, "Matt's Turkish Meatball Burgers", I have hit gold in a new pasta salad recipe. It's literally pasta thrown on top of romaine. And it is perfect. 

    I'm really not going to bore you with a lot of details today. Get some of those spiraly noodles and have at it! It's really a perfect pairing to any backyard BBQ this summer, and even better the next day at work for lunch. Trust me, I just had it at my desk. 

    But I will tell you one thing before I get to the recipe. The Parmesan is KEY. This pasta salad is all about the textures you combine. When I was making the salad again last night for Ethan and I, a wine glass of ours broke all over the freshly grated Parmesan I prepared for it. According to Dr. Ethan, DO NOT risk eating food that had glass shards in it. Like, even if you think you got it all. Even a minuscule piece could ruin your insides. I won't go into much more detail than that. But all I can say is that we had to eat without the cheese and it was definitely  not the same. You must drive yourself to the store if you break a glass in your cheese. It is an integral partner to this flavor pallet. 

    So here's what you need for a new family favorite, Chicken Caesar Pasta Salad


    INGREDIENTS

    • 1 package rotini pasta. Also known as spiral pasta. You can use fusilli too.
    • 1.5 cups Parmesan (from the package or freshly grated)  
    • 8 oz grape tomatoes 
    • 2 cups shredded chicken
    • 1 cup light Cesar dressing. I used Ken's Steakhouse dressing. You want it to be oil based. Not creamy
    • 1 head romaine lettuce 

    DIRECTIONS
    • Preheat your oven to 375 degrees F. Once hot, put in 2-3 chicken breasts that have been salted and peppered. Cook according to the package. Generally, if it is frozen it'll take 40-45 minutes. If they are thawed, it'll take about 20-25 minutes.
    • Get 6 quarts of water boiling. As an old cooking teacher once said to me, "You want to salt the water for the pasta as if it were swimming in the sea"
    • While the water is boiling for the pasta, cut all your grape tomatoes in half. Also wash and thoroughly dry the lettuce. Then shred the lettuce. 
    • Cook your pasta according the package once the water is boiling. This will take 7-9 minutes. 
    • Grate your cheese, if needed.
    • Once you have all your ingredients prepared. Make sure the pasta has cooled and you have shredded your chicken. Here's a good way how to do that .... USE YOUR FINGERS!
    • Now it's just a matter of getting a big bowl, dumping in all the ingredients, and tossing them in your dressing. 
    • If you want to kick it up a notch, serve with lemon wedges. And don't just stare at the wedges use them when you sit down. 

    Last minute pro tips for left overs:
    • If you know you won't be able to eat all of this in one sitting, I suggest you keep the lettuce out of the bowl when you toss in the dressing. Keep it to the side and put the pasta on top when serving up individually.
    • When taking it to work, or storing for later, make sure you put in the pasta part first and the lettuce on top. It will keep from wilting that way.

    And there you have it! A quick and simple, filling side dish. Or really, a whole meal.
    Subscribe below by email to never miss a beat.
    Eat well! Be well, my friends!

    Monday, May 25, 2015

    Matt's Turkish Meatball Hamburgers

    Memorial Day: BBQs, swimming pools, FINALLY some sunny weather. Memorial Day in Seattle is the official, “Summer is just around the corner” kick off. Most people in other places would say it is actually the kick off of summer. But here, that doesn’t actually happen until after 4th of July.

    So I hopped on a flight for the long weekend. I decided to chase some sunshine find where the real summer lives. Enter in Scottsdale, Arizona. One of my very best friends lives here with her finance. Not only had I NOT met her guy, I had also NOT seen her in over a year. Knowing us, that was far too long.


    We danced, we adventured through cactus gardens, and we ate the best Mexican food (in the states) you can ever find. I sat in the pool; I got a tan – a much-needed getaway after some stressful months at work for me.

    But like I said, I was also on a mission. I had not met Sammie’s man yet! Though she’s already locked him down for life, I still needed to approve of him... you know how it goes.  There was only one way to find out if this man is worthy of my friend’s heart. We had to DANCE! They took me out to all their local haunts. Believe it or not, Scottsdale has a cool nightlife scene. I had no idea! And on top of that, these folks have high expectations! Sammie says that bars and restaurants will close just as soon as they open. My favorite part? Taking a golf cart cab home. Trust me, these aren't your grandma's golf carts.

    Well, long story short Matt didn’t dance. But, he did spend the whole night talking about how much he loves my girl. Yup, I was sold!  So I thought to myself, “okay Sammie, but can this man cook??”


    I won’t keep you in suspense…He can.

    The day after dancing, we took it easy by the pool. Walked the dogs. Matt watched historic shows on TV.  And then we all made dinner together. I made a pasta salad that I’ll share with you all on a different day. Sammie made brownies. And Matt made hamburgers using his Dad’s Turkish meatball recipe.

    YOU HEARD ME CORRECTLY.


    Matt’s dad is from Turkey and I guess makes really good meatballs. Simple and straightforward, they thought, “Well we can grill these, right?”  Oh yes you can!

    I’m carefully writing this as I sit at the airport and dreaming of the next time I can try these burgers out. So from Matt’s backyard (with a pool!) to your kitchen here are:

     Matt’s Turkish Meatball Burgers.


    INGREDIENTS

    • 2 cups ground beef
    • 4 cloves garlic, minced
    • 1 onion, diced finely
    • 1 jalapeno, diced finely
    • 1-cup breadcrumbs
    • 2 eggs
    • Salt and Pepper to taste


    DIRECTIONS
    •  Mince the garlic and dice the onion and jalapeno. Make sure everything is very small.
    • Combine all ingredients and begin to form the hamburger patties. Here’s a good tutorial on how best to do that:
    • Let the patties rest in the fridge for 30 minutes (at least!). These are prone to fall apart on the grill, so you want them to be set.
    • Fire up the grill and cook until there’s pink, some pink, or no pink in the middle. (To be safe, always cook ground beef to where there’s no pink)
    • Grab your favorite veggies, buns, and condiments, and enjoy!

    Happy Memorial Day! Eat well, be well! And subscribe below to never miss a beat.