Monday, January 18, 2016

College Orzo Salad


Like most in college, I didn't know my way around a kitchen and I definitely didn't have the money to do anything about that. But I did know I liked pasta and I was trying to eat healthy. Not really easy to do on a tight budget. But I did my best and it helped me discover my creative side in the kitchen. That's how this orzo salad came to be. I needed something cheap, filling, and wholesome. My dorm room became the place for my friends to escape a little from all the demands of school. I'd make this easy salad and we would forget that we weren't at home. Those simple dinners turned into long nights chatting and dreaming, and then finally, without realizing it, we had created a new home together. It's silly for pasta to mean this much, but then why does it taste so delicious?


Back in the day with two crazy fellas
Anyway, throughout all these years, I still make this salad. It's great for a light dinner and can do double duty as a filling lunch the next day. But I decided it was time to "ADULT UP" if you know what I mean. It used to be a very simple salad, not a whole lot of flavor ... just straight forward and simple. But it needed more .... so I gave it more. Now it's a complete meal in one bowl with a kick of flavor and spice to boot. So, let's go for it! 


INGREDIENTS:
  • 2.5 cups cooked orzo
  • 5 ounces spinach, julienned
  • 1 tablespoon olive oil
  • 1 garlic cloves, minced
  • Two 18 ounce jarred, diced tomatoes (find it at Whole Foods ... canned works too)
  • 1/4 fresh basil, chopped
  • 1/4 cup capers 
  • 4 links chicken sausage 
  • Salt, pepper, chili flakes (to taste)
  • 1.5 cups feta cheese 


DIRECTIONS:
  1. Heat a quart of salted water, and bring to boil. Add the orzo and cook for 9 minutes. Drain and toss with a dash of olive oil to prevent sticking.
  2. In a large sauce pan, heat olive oil and garlic over medium high heat for about 1 minute. Add the jarred tomatoes and bring to a boil. Stir in salt, pepper, chili flakes and basil. Turn the heat to medium-low and simmer for 15 minutes. 
  3. Cook your chicken sausage according to the package and slice. I like to bake mine.
  4. Add the spinach and sausage to your tomato mixture and then turn off the heat once fully combined. You don't want the spinach to get too wilted. 
  5. Grab a big bowl and combine the tomato sauce and orzo. Once combined, toss in the feta cheese. 
Enjoy! Follow by email below to never miss a beat with Karen's place :)


Sunday, January 10, 2016

Deconstructed Fish Taco // SALAD


The time has come to end the all day snacking on sugar, the lazy days in front of the TV watching sappy Christmas movies, and the late nights experimenting with gin and whisky. It's a new year, so many of you are thinking about healthier habits. 

Some of you may need to just hit the reset button, try a cleanse, and start fresh. If you're looking for something like that, may I suggest the Taco Cleanse? Yes. You just heard me correctly. There is such thing as a TACO CLEANSE. I believe this is the best thing to ever come out of the internet. The "Taco Scientists" in Austin, Texas have come up with a 30-day plan to help you put a healthy twist on your favorite recipes and justify eating tacos morning, noon, and night. If you don't believe me, read more here. 


Alright, alright. Let's get to reality here. Today, I do have a fantastically healthy recipe for you and it does involve tacos. It is NOT an officially approved Taco Cleanse recipe, though. Thanks to Rick Bayless, an amazing chef who cooks Mexican inspired dishes, I have learned the art form of the fresh fish taco. I've added my own twists and made the tacos a salad, but if you decide to put all of these ingredients into a tortilla ... I will not blame you.

Let's start by getting a sauce pan out and filling it with water, juicing a lime, smashing some garlic, and pinching some salt. You get the picture, we are going to poach that fish. And yes, leave the juiced lime in there while you cook it. 

Don't be afraid of this recipe. There are a lot of steps, but it IS NOT complicated. Just read it through and go for it! I promise it'll become a new favorite :)


Fish Taco Salad
*Adapted from Mexican Everyday by Rick Bayless


INGREDIENTS:
For the fish:


  • 4 tilapia loins
  • The juice from 1 lime (use the whole lime rind for poaching process)
  • 1 quart of water
  • Pinch of salt
  • 1 garlic clove, smashed 
For the salad:
  • 1 small radicchio
  • 1 small carrot, grated 
  • 1/4 cup fresh lime juice 
  • 1 small white onion, diced 
  • 1 small bunch radishes, sliced thinly 
  • 1 jalapeno, stemmed and finely chopped 
  • 1 garlic clove, minced
  • 3 tomatoes, cored and diced 
  • 1/2 cup chopped cilantro 
  • Salt 
For the dressing (optional and only to be tossed on the radicchio & carrot)
  • 1 garlic clove, minced
  • 1 lime, juiced 
  • 2 tablespoons whole goat yogurt (greek yogurt would work too)
  • Salt and pepper to taste
  • Agave syrup to taste


DIRECTIONS:
  1. Start by making the fish filling. Heat water, lime juice, lime rind, salt, and garlic in saucepan. Bring to boil. Place tilapia in water and wait for it to come back to boiling. Turn heat to medium and simmer for 3-4 minutes. After that, turn off the heat and cover the pan. Let it rest and cool in the saucepan while you prep everything else. 
  2. Next, chop the radicchio and grate the carrot and toss in the dressing. Set aside in the fridge to marinate. Note: this mixture will stay separate from the fish and the rest of the ingredients. It's acting like a SLAW and the fish is acting as the topping. Also note, this part is all optional. You can top the fish on some regular lettuce and it'll still taste great.
  3. Now, you still have more ingredients to combine with the fish. Let's keep going. Get a big bowl out. Chop the tomatoes, cilantro, onion, jalapeno, radish and mince the garlic. Combine these ingredients with lime juice and salt. 
  4. Now that your fish has cooled in the water and is fully poached, place the tilapia loins in the big bowl with the tomato/onion mixture. Grab a potato masher to shred and combine the fish with the vegetables. 
  5. Serve with EVEN more limes (because they are the best), hot sauce, and tortillas if you want. 
Enjoy!
Follow by email to subscribe! 

Did you make this? Take a picture and tag me on instagram @karenleannkirsch!

Sunday, January 3, 2016

Ginger Orange-Cucumber Salad


Ethan really likes things to taste "fresh". It took me a long time to really understand what he meant by that. But in essence, it means he likes eating things that are good for him. Food that won't feel heavy in his stomach but still give him the energy to play all those Dota games .... As for me, I really need things to be full of flavor. A lot of times, straight veggies and plain chicken WILL NOT cut it for me. It's caused some differences in the kitchen, but after a year or so of trial and error, I think we are finding a new palate path together. Today's post is a perfect example of that. It's really, really, fresh but also PACKED with unique flavor. It's a great salad that will infuse some awesome Asian inspired tones into to your next meal. Or just add some simple baked chicken (or chickpeas) to the bowl for a compete, light, meal. 

I think this one is coming just at the right time for the New Year, don't you think?
So, here we go:


INGREDIENTS:

For the dressing:
  • 2 tablespoons honey
  • 2 tablespoons rice vinegar
  • 1 heaping tablespoon minced ginger 
  • 1/2 teaspoon salt
  • 1/4 teaspoon red pepper flakes
For the salad:
  • 1 medium Orange, peeled, sectioned, and diced
  • 2 Satsumas, peeled and sectioned 
  • 1 cup English Cucumber, thinly sliced 
  • 1/4 cup Cilantro, roughly chopped 
  • 1/4 cup Green Onion, thinly sliced (green part only)
  • 1 tablespoon Fresh Mint, minced  


DIRECTIONS:
  • Whisk together all of the ingredients for the dressing in a small bowl
  • Chop and prep all of the main ingredients for the salad and combine in a bigger bowl
  • Toss in the dressing and combine the salad. Serve immeadiately.


And that's it! Good for you and it actually tastes good. 
Maybe sticking to those resolutions won't be so hard after all? 

Eat well!
Be well!
Follow by email below to always have Karen's Place delivered to your inbox :)

Sunday, December 27, 2015

Granny's Modern Gingersanps

We called my Great-Grandmother, Granny. She raised three kids on a farm way up north in a small town called Sedro-Woolley. I have a lot of small memories of Granny. But what stands out to me most is when my family and I moved to a new house that was right around the corner from her. I remember walking down to see her before school in the mornings. We would sit at her round kitchen table and she would tell me about days past on the farm and what my Grandpa and Aunt Deanie were like when they were little. She would also revel in stories about when she was my age. No question of mine was left unanswered and I always felt special when she told me a funny story that none of the other grandkids knew yet.


At that time, I was writing a short story. It was just a hobby of mine, but she was convinced I should publish it. I was 10, and trust me the story was silly. But that's what I really loved about Granny. I knew that she loved me very much and thought I was good enough to do anything that I wanted to do. 


Granny passed away when I was a freshman in college. I wrote that reflection above right after she died. I found it the other day in my email when I was looking for her gingersnap recipe. She didn't cook much for us while when I was growing up, but this cookie recipe of hers was always my favorite. The recipe below is written in her handwriting....


Per usual, I'm taking a recipe and making a twist on it. This time, I'm updating Granny's recipe a little. Today's research recommends that Crisco is not very good for you. And I'm not saying this new recipe is GOOD for you .... but butter is not as likely to mess up your body as much. I took down the flour and the sugar a little too. So while this isn't quite true to what you see above, it is an homage to my Granny Bernice. I hope you like them!


INGREDIENTS

The dry (in a medium bowl)

  • 3.5 cups flour
  • 1 teaspoon baking soda
  • 1 heaping teaspoon cinnamon
  • 1 heaping teaspoon ginger (have some extra to roll the dough in)
  • 1 [even] teaspoon cloves
  • 1/8 teaspoon salt
The wet (in a large bowl)
  • 1 cup butter, @ room temperature  
  • 1 cup white sugar (have some extra to roll the dough in)
  • 1/2 cup brown sugar
  • 2 eggs, @ room temperature 
  • Scant 1/2 cup molasses 
  • 2 teaspoon vanilla extract 


DIRECTIONS
  1. Preheat your oven to 350 degrees F and line a baking sheet with parchment.
  2. In a medium bowl, sift together the dry ingredients.
  3. In a large bowl, beat together the butter and the sugars.
    The mixture should look fluffy. 
  4. Then, beat in the eggs, vanilla, and molasses to the butter-sugar mixture.
    Stir until just combined. 
  5. Next, slowly add in the dry ingredients to the wet. 
  6. This optional, but I would suggest chilling the dough for at least 20 minutes. 
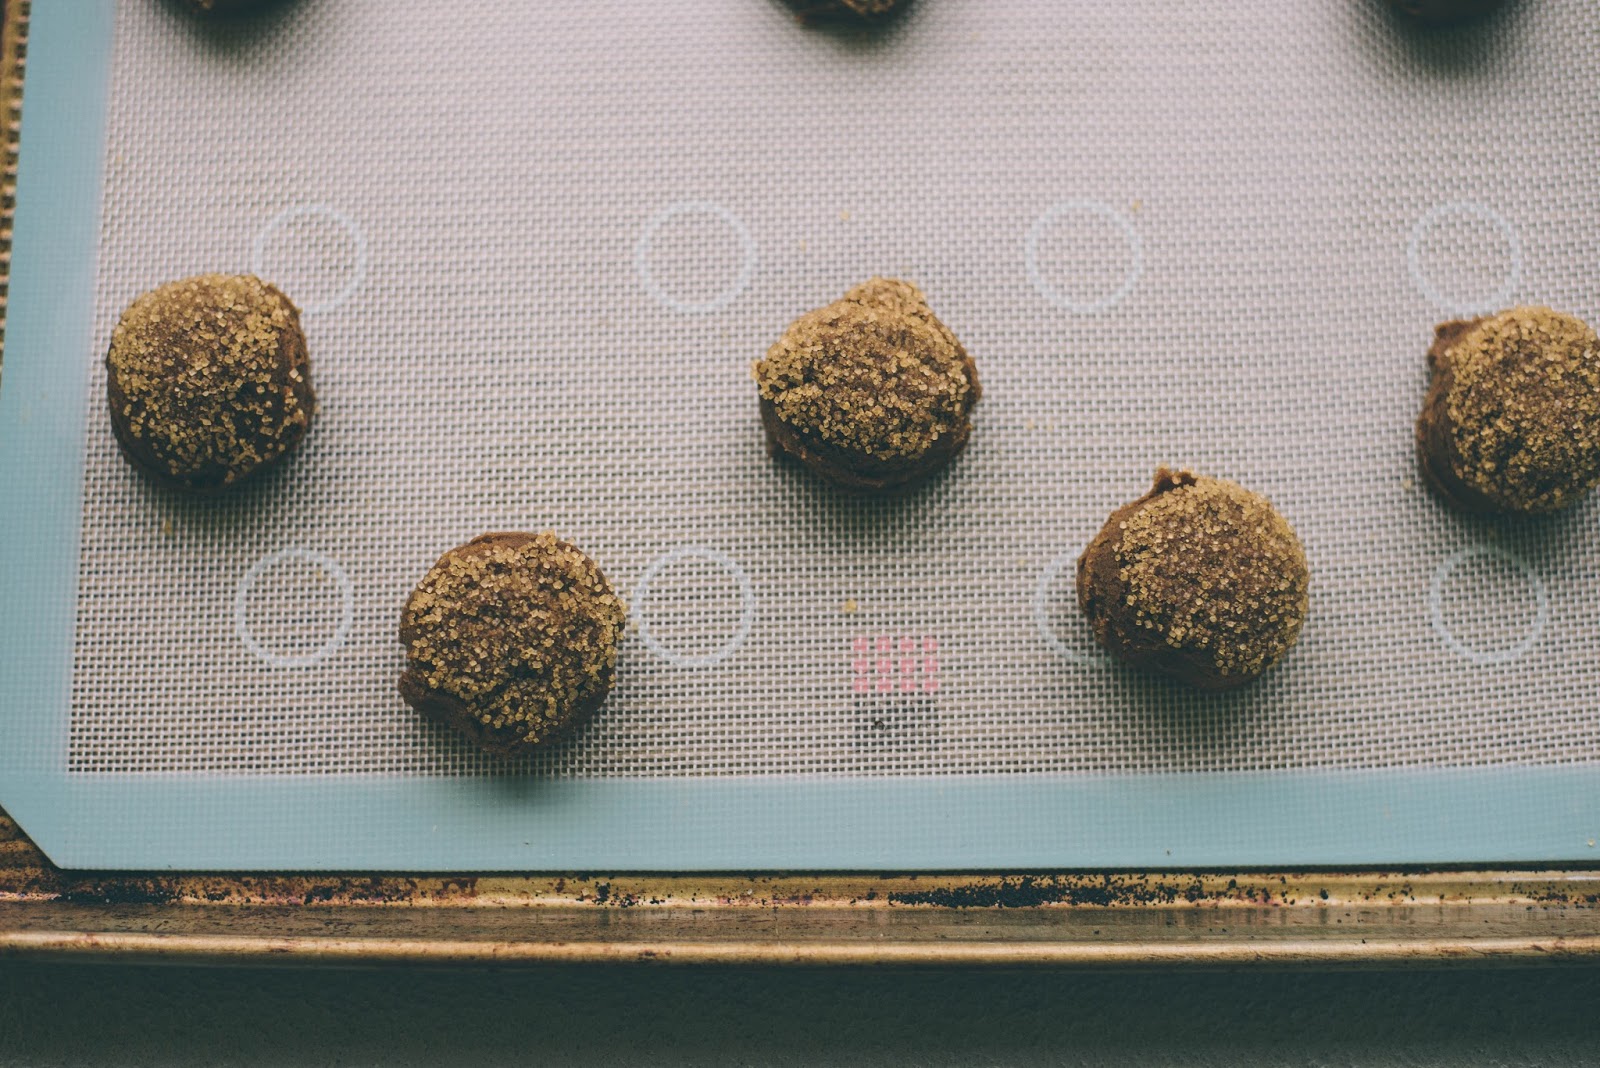
  7. Finally, using a cookie scoop, shape the dough and roll it in a sugar + ground ginger mixture. Place on the baking sheet and bake for 11-12 minutes.
  8. Cool completely. Serve with some green tea :)

Wednesday, December 16, 2015

Ethan's Favorite Cut Out Cookies + Matcha

Ethan isn't a man with much of a sugar tooth. I think I make up for both of us in that category. So it makes making baked goods disappear pretty tough around this house. He's a man of mild taste when it comes to sweets, and no other cookie can top his favorite list than his mom's famous cream cheese cut out cookie recipe. 


But who can resist trying to one-up a classic?
I can't.  

I thought Santa would appreciate some caffeine with his cookies to boost his energy during that long flight. So I added some green tea matcha powder* to the Diana's popular batter...and maybe some cinnamon too. (Surprised? Me neither.) Forgive me, Ethan! I know this one had you skeptical... but your sister sure did love the idea :)

*You remember matcha, right? If not, check out my recipe for Chocolate Matcha Energy Balls. You can find matcha at PCC or Whole Foods. It's not only AWESOME for naturally dying things, but it's also pretty awesome to drink and bake with. You really can't taste the green tea, but it sure makes the cookie turn a beautiful new color without using frosting.

Looking for a twist on an old classic? These mild, green-tea sugar cookies are surely the ticket amidst the sugar blizzard we call December. 

Let's get on with the recipe, shall we?


 INGREDIENTS 
THE WET (cream together using electric mixer):


  • 1 cup butter
  • 1.5 cup sugar
  • 2 eggs
  • 8 ounces cream cheese 
  • 4 tablespoons yogurt 
  • 1 tablespoon vanilla 
THE DRY (whisk together or sift):
  • 4 cups flour 
  • 2 heaping teaspoons matcha (optional)
  • 1.5 teaspoons cinnamon (optional)
  • 0.25 teaspoon baking soda
  • 1 teaspoon baking powder 
  • 0.75 teaspoon salt
  • Raw sugar for topping
DIRECTIONS
  • In a large bowl or mixer, blend the butter and sugar until fluffy. Add the eggs. Stir until just combined. 
  • Mix in the cream cheese, yogurt and vanilla. 
  • Next, slowly add the dry ingredients you have already whisked together in a medium bowl to your wet ingredients. 
  • Chill the dough for at least an hour
  • Preheat oven to 350 degrees F and line baking sheet with parchment
  • Then, roll out the dough and cut it into shapes using a cookie cutter. Top with raw sugar (optional)
  • Place on cookie sheet and bake for 11-12 minutes


Enjoy!
Eat well! 
Be well!
Follow by email below!
Merry Christmas :)


Sunday, December 6, 2015

Cinnamon Chocolate Chip Cookies

This foodie road of mine began with one specific recipe. Today, I share it with you. Just in time for the holiday season. 


Enter the extra cinnamony, chocolate chippity, cookie. When I was in college, cookies were the only thing in the kitchen I felt really confident making. And growing up, if I was stressed out or sad my mom would make me some cookies to feel better. Looking back, it may have not been the best way to deal with tough times, but nonetheless, cookies are my always go to comfort food. SO, as may be able to deduce, I made a lot of cookies in college, especially for my friends.

One night, I decided to make my own recipe. And that is when I discovered I am in LOVE with cinnamon. Trust me everyone, double what the recipe tells you when it comes to cinnamon from now on. You'll be surprised at how much more flavor you'll start to notice....

Also, cinnamon is super good to have in your life. Check out these sources:
Authority Nutrition
Health.com


HA! I just convinced you that these cookies are good for you.... Reality check, there's still a butt ton of sugar and butter in these babies ...  because I love you.
Let's get on with the recipe, shall we?

INGREDIENTS
Dry
  • 2 cups flour (quinoa flour works great too!)
  • 3 heaping tsp cinnamon
  • dash of nutmeg
  • 1/2 tsp salt
  • 1/2 tsp baking soda
Wet
  • 1 cup butter
  • 1/2 cup white sugar
  • 1 cup brown sugar
  • 1 whole egg + 1 egg yolk (how to separate a yolk)
  • 1 tablespoon vanilla
  • 1.5 cups chocolate chips (add in white chocolate chips for different texture and taste)

DIRECTIONS
  • Dump all of the dry ingredients in a medium bowl. Whisk with a fork to combine. 
  • In a large bowl or your Kitchen Aid, whisk together the butter and sugars. Stop when the mixture looks fluffy. Add the eggs and vanilla. Stir to combine. 
  • Then, slowly start adding your dry ingredients to your wet ingredients. 
  • Once combined, grab a spatula and stir in the chocolate chips. 
  • Refrigerate your dough for 30 minutes. Preheat your oven to 325 degrees F. Line a baking sheet with parchment or slip mat. 
  • Now, the reason why these cookies are to die for is because of this next step. Put your cookie scoop down and grab a 1/4 cup measure. 
  • Use a 1/4 cup measure to scoop the dough out onto the baking sheet. 
  • Bake for 17-18 minutes. Cool completely before enjoying. Unless you like a gooey mess...then go for it. 

And there you go! That is my most secret, most favorite recipe. I hope you enjoy the cinnamon! Merry Holiday Season, everyone!

Follow by email! Enter your email below and never miss an update :)

Sunday, November 29, 2015

Pumpkin Scones


I woke up last Sunday morning feeling like a lazy morning in bed was highly needed. But, I also found myself with an itch to make something new. Scones were calling my name. And they needed to feel like late autumn. So I grabbed the canned pumpkin from our laundry room / pantry and decided some dried cranberries would be a great addition too. 

Between the raw sugar sprinkled on top to the soft morning window light streaming through the bedroom, that Sunday morning couldn't be beat. 

Now it's time for you to have an adventure and then take a load off.


Pumpkin Scones
*Adapted from America's Test Kitchen 


INGREDIENTS

  • 2 cups flour
  • 3 tablespoons sugar (plus some raw sugar for dusting on top)
  • 1 tablespoon baking powder
  • 1/2 teaspoon salt
  • 5 tablespoons chilled unsalted butter, cut into 1/4 inch pieces 
  • 3/4 cup dried cranberries 
  • One 15 ounce can pumpkin 
DIRECTIONS
  • Preheat the oven to 450 degrees F and line a baking sheet with parchment 
  • Get your food processor out, pulse the flour, sugar, baking powder, and salt together for about 3 pulses. 
  • Scatter the butter in the processor and pulse the mixture until it looks fine like cornmeal. 
  • Transfer your mixture into a large bowl and add the dried cranberries. 
  • Stir in the pumpkin using a spatula until the dough just begins to form. 
  • Flour a surface on our your counter. Turn out the dough to that surface and knead until it forms a rough, sticky ball. 
  • Mold the dough into a 9-inch cake pan. Pop it out, and get a large, sharp knife out. Cut the dough into 8 wedges. Lightly sprinkle the wedges with some raw sugar.
  • Place the wedges on your baking pan and bake for 12-15 minutes. Should be golden brown. 
ProTip: wait until the scones are completely cooled until eating. The flavor is better that way!


Here's to more lazy Sundays ahead.
Cheers!