Sunday, August 30, 2015

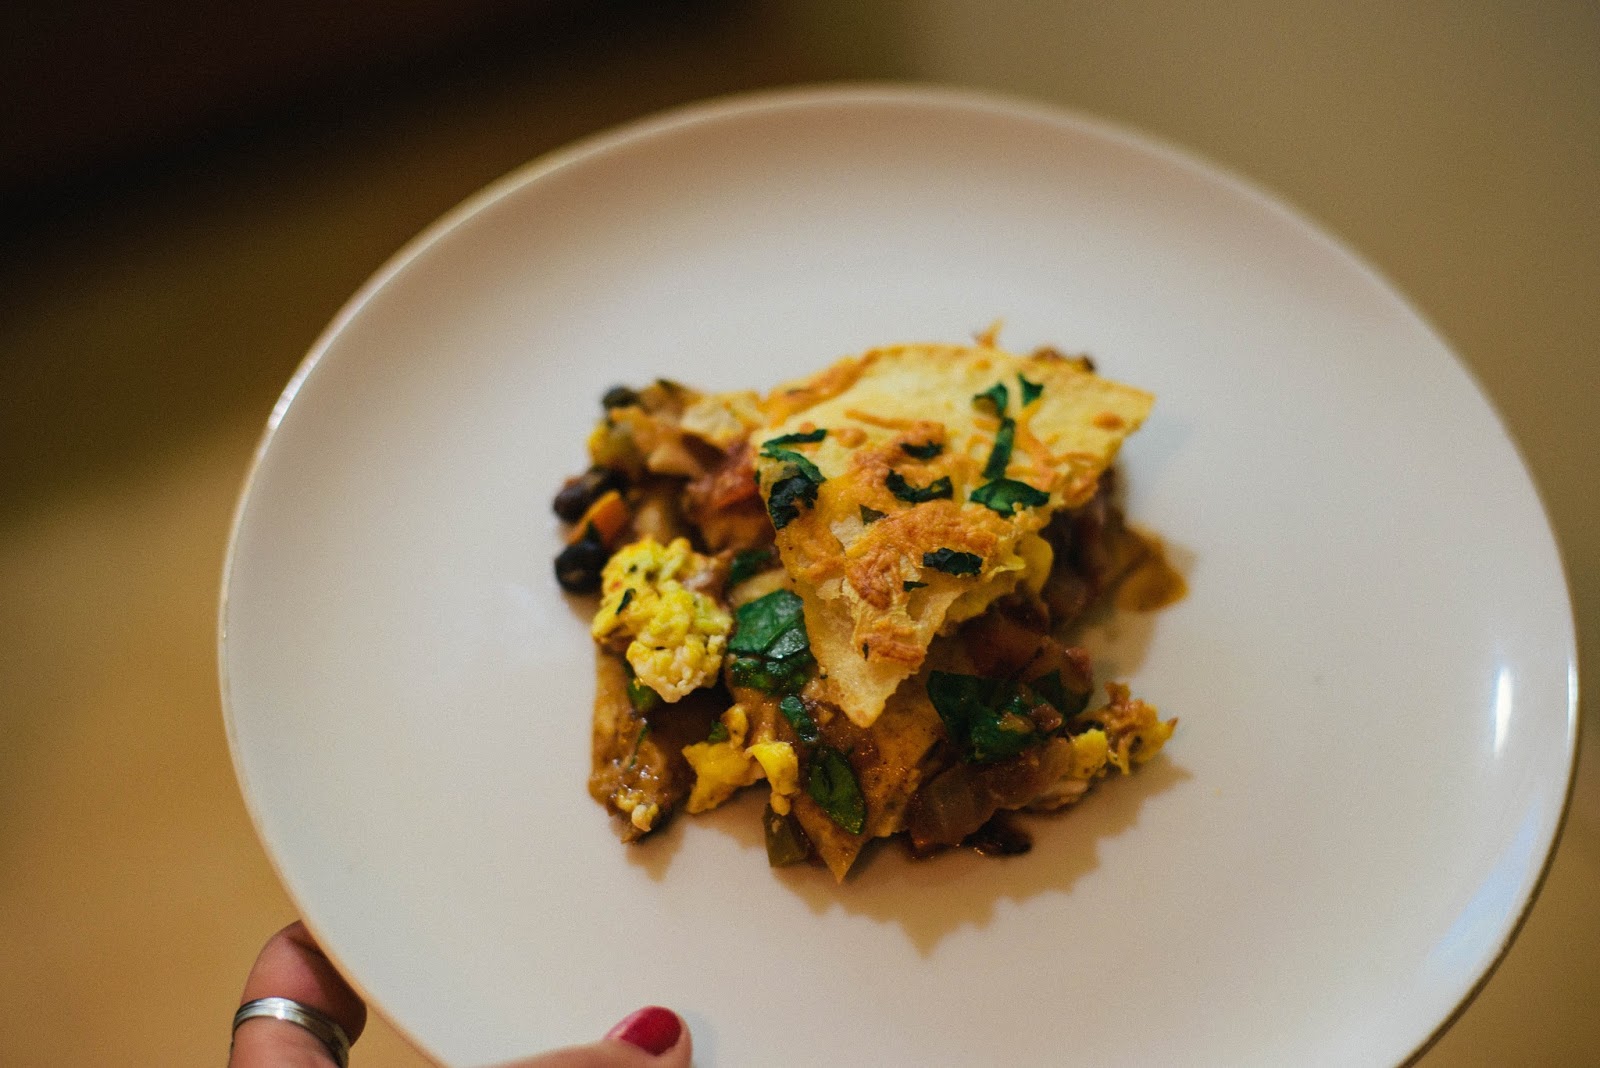
Span"ish" Egg Bake

Oh, my dear friends. I miss you! So here's what has happened this summer:
  • I turned 25
  • I quit my job
  • Ethan and I participated in our 2nd triathlon together (my 3rd total)
  • I started a new job
  • We are moving back to the east side in two weeks
As you my surmise, the blogging has gone by the wayside a little. And boy have I missed it. Luckily, I have a lot of ideas stewing, a bigger kitchen to look forward to, and many more friends to introduce you to! Bare with me as I finish out some things this summer. My blogging may be a little sporadic until I find my new normal again.

Welcome to my Span"ISH" Egg Bake. An idea that has been baking in my mind for a few weeks, but I just haven't had time to test it out. It's part American casserole and part Mexican breakfast chilaquiles. AND ALL TOO DARN DELICIOUS. This the epitome of wholesome cooking in my book. Great flavors and nutritious ingredients combined into one mind blowing bite. ENJOY!


INGREDIENTS
  • 4 eggs, scrambled 
  • 1 tablespoon butter
  • 1/2 onion, diced
  • 1 bell pepper, diced
  • 1/2 cup black beans
  • 1/2 cup salsa, chunky!
  • 3 large tortillas (corn or flour)
  • 1/2 cup cheese, grated
  • 1 cup fresh spinach, chopped
  • Salt & Pepper, to taste
  • 1 clove garlic, minced 
  • 1 tsp chile powder
  • 2 tsp dried oregano 
DIRECTIONS
  • Sauté onion and peppers with spices and garlic 
  • Scramble the eggs and add a dash of oregano 
  • Melt the butter in a pan over medium heat, lower the heat to medium low, and cook the eggs
  • Preheat your oven to 400 degrees 
  • Grab a pie dish and spray with cooking spray 
  • Once the eggs are done, your vegetables are chopped, start layering your ingredients
    • Tortilla
    • Onion / pepper 
    • Beans
    • Salsa
    • Eggs
    • Spinach
    • Cheese
    • Repeat 1 more time and top everything with the final tortilla and remaining cheese 
  • Serve with sour cream, hot sauce, extra salsa on a slow Sunday morning and enjoy :)

Thursday, August 20, 2015

Semi Homemade Baked Burritos


When you start a blog, you read a lot of other blogs about how to write a blog. How to gain followers, when and how often you should post content, how to find your voice... etc... So when you start writing, you make a plan to push out your best content on a regular basis. 

But sometimes, life throws a curveball at you. For the last two months, I have been looking for a new job, finding a new place to live, gaining a new job, and going through training. It's nuts! And for me, all of this change has put a real strain on my creativity and my ability to post regularly. Luckily, I'm seeing the light at the end of tunnel and I feel my energy coming back. Hooray!


But here's the conclusion I have come to, you and the rest of the world have the same days like me. You come home, you're tired, you can barely think, and it takes you everything NOT grab the car keys and eat out. On days like these, you CAN still make a wholesome meal at home with very little effort. 

Enter the semi-homemade baked burrito: 
- I had chicken already cooked, but you can use any left over meat *
- I always have beans, tortillas, and cheese on hand
- I also had a little left over southwestern salad dressing to top it off with something special


INGREDIENTS:

  • 1 or 2 tortillas, depending on how much you stuff in it
  • A handful of shredded cheese
  • 3 spoonfuls whole black beans
  • 1/4 cup diced chicken, cooked*
  • 1/2 tomato diced 
  • 2 tablespoons creamy salad dressing (optional) ... salsa would work well too!
  • 1 teaspoon olive oil
DIRECTIONS
  • Preheat the oven to 425 degrees F
  • Grab all your ingredients and pile them into the tortilla(s)
  • Place your burrito on a baking pan and lightly sprinkle oil on top
  • Bake for 12-15 minutes until lightly brown and you can hear it bubbling 
  • Top with the salad dressing and enjoy!
  • Serve with guacamole, a side salad, fruit, veggie, etc

So there you have it; a filling meal without too much effort! Enjoy!


Tuesday, August 11, 2015

Fast Chicken Piccata

Last week was a doozy. In the midst of job searching, job interviewing, I still need to keep up with my current position. And yes, my current employer knows I am doing all this. It is an amicable departure. But nonetheless stressful!

I took a vacation day for an interview I had last week. Mind you the interview was only 30 minutes, but it was an hour away. So I was determined to make the most of it! I went to Target and got two new books. I went to the movies and saw Trainwreck. And then I walked around Trader Joe's, wondering what lovely meal I could make later that evening. I had the time and I wanted to do something I had never done before on my own. 

And then it hit me! Chicken Piccata. 


Lemony, tangy, rich, and delicious, this Mediterranean entree is super quick and will delight anyone at your table. It sure surprised Ethan!

Here's what you do....


INGREDIENTS
  • 2 chicken breasts, lightly pounded
  • Salt & pepper
  • Flour, for dredging
  • 4 tablespoons butter
  • 2 tablespoons olive oil
  • Juice of two lemons
  • 1/2 cup chicken stock
  • 1 small jar of capers, drained
  • Fresh parsley 
DIRECTIONS
  • Cover a cutting board with plastic wrap. Set the 1 chicken breast at a time on the board and cover with plastic wrap on top. Using a heavy bottom glass or the smooth side of a meat tenderizer, pound the chicken so that it is 1/2 inch thick throughout. 
  • Season the chicken with salt and pepper. Then dredge it in flour. 
  • In a large skillet, heat 2 tablespoons of butter and 3 tablespoons oil. When it starts to sizzle, add the chicken. Cook on one side for 3 minutes and flip.
  • If browned, turn the chicken over and cook for another 3 minutes.
  • Remove and transfer to a plate with paper towels on it. 
  • While the chicken is cooking, combine the lemon juice, chicken stock, and capers. Whisk together.
  • Once the chicken is removed from the pan, add the lemon juice, chicken stock, and capers to it. Bring the broth to a boil, and scrape the bottom to remove the brown bits. You're deglazing now!!
  • Return the chicken to the pan, and simmer for 5 minutes. 
  • Remove the chicken, and then add the remaining 2 tablespoons of butter to the broth. Whisk fast and then pour over your chicken.
Serve on a bed of greens or noodles and enjoy!
Eat well! Be well! And subscribe below to never miss a beat.

Monday, July 27, 2015

Sourdough blueberry pancakes

I took a tiny break from posting! Hope you didn't miss me too much. Lots of projects are filling up my free time, which are exciting and time consuming. I celebrated turning 25. And I also just celebrated 4 years with Ethan. It's been busy, but I haven't forgotten about you.

For our anniversary, Ethan and I did some house sitting for his parents and went to dinner by Snoqualmie Falls. It was nice to get away, to do nothing, and have lots of space to move around in quietly. Living in the city feels like you're going nonstop. There's always a friend to hang out with, another event to go to, a different experience to .. you know experience. You can't miss out on anything. And as much as I love that, and so does Ethan, we're getting old. Ha! We like our quiet time, we like our lazy time. 

On Sunday morning, we took over Ethan's mom's kitchen with vigor and determination! It had been a while since either of us had the energy to make something special. Our small little basement gets dirty quickly. It makes it hard for us to want to do anything sometimes, especially when we feel busy. So for breakfast we made sourdough blueberry pancakes.


To make these, you'll need a sourdough starter. I had no idea that you can use the same bacteria strand over and over again, as long as you feed it each time you take away from it. Here is how you can create your own.

Luckily, Ethan's parents have had the same one for YEARS!. He told me that it came from a starter that is over 80 years old. I mean, wow. Who knew?! Food in general just got way cooler for me. It makes me sort of like science...at least for a second. 


These pancakes don't need a lot. You put a little maple syrup and maybe some cinnamon on top and you are good to go! They are sweet and tangy, hearty and delicious! And if you can see... those are some of the fresh blueberries we picked earlier this month at the UPick farm. You can never go wrong with fresh blueberries!

So let's get down to business, here's what you do:


Can you read Ethan's handwriting, I sort of can....


INGREDIENTS

  • 1 cup flour
  • 1 cup sourdough starter
  • 1 egg
  • 1 tablespoon sugar
  • A dash of salt
  • 1-2 tablespoons vegetable oil (really any oil would work...)
  • 1/2 teaspoon baking soda
  • 1 teaspoon water
  • 1 pint blueberries


DIRECTIONS
  • Combine the flour and sourdough start, let it rest over night (it needs to combine and rise, and all that good science stuff...)
  • The next morning, combine the flour & sourdough mixture with the egg and sugar
  • In a medium bowl combine the salt, baking soda, water, and oil
  • Combine both bowls and stir for 30 seconds (you may need to adjust the water amount depending on how thick the batter is)
  • Heat a skillet on medium
  • Using a 1/4 cup measurement, spoon out the batter and sprinkle on the blueberries
  • Cover the blueberries with extra batter before flipping
  • You will know the pancakes are ready to flip when tiny bubbles start sprouting up all over 
  • After you've flipped it, let it cook for 2 minutes. Check to see if the pancake is golden brown. If it is, put it on your plate!
  • Top with maple syrup and a dash of cinnamon, grab your fork, and eat quickly...or slowly....whatever you want
  • Enjoy!


Hope you enjoy this week's edition of Karen's Place. Subscribe below to never miss out. 

P.S. Did you make any of these recipes? Did you make this one? I want to know! Take a picture and tag me on instagram @karenleannkirsch :)

Friday, July 10, 2015

Farm Fresh Blueberry Cardamom Galette

Last weekend, I went to my very first U-Pick Blueberry farm. Ethan's parents took us out to North Bend for the opening day. We got there early, and found that we were not alone in our plans! People poured into the fields with buckets, sun hats, and hilarious conversations to eavesdrop on between the rows of berries. 

We were in the shadow of Mt. Si, and after months of going a million miles an hour in the city, I felt relaxed and clear. 


I had never really experienced anything quite like picking your own food before. While U-Pick is really fun, it's a lot of hard work! I was hot, distracted, and my back started hurting. It made me really start thinking about the folks who provide us fresh berries and produce every day. I'm not sure what would motivate someone to stand out in the hot sun every day, but I do know that we don't support our farmers and their workers enough. 


46 pounds of blueberries later. It was time to play in the creek to cool off, get back home, clean the berries, and split them up between us all. We freezed some and kept some fresh and uncleaned for eating and baking with during the week. 


For Ethan and his family picking berries is a summer tradition that lasts all year!


So, since we had a bazillion berries at our finger tips, it was time to start baking. I've been reading a lot of food magazines lately, and I have to say, if you have never invested in some of these I would! Fine Cooking, Cooking Light, America's Test Kitchen, Food & Wine, are just some of sophisticated resources that have a lot to teach you! The thing about food blogs - including mine - is that you never quite know what you're getting into. This blog is my way of reflection, connecting to my friends, practicing my art, and exploring a new career path. I am not a professional recipe curator (at least not yet!). But these magazines have rigorously tested their recipes, know the best tools, and can help you learn how best to prepare meals. 

Now enter this blueberry cardamom galette, inspired by Fine Cooking and adapted by myself slightly for an added punch ... because, well, cardamom. 


Blueberry Cardamom Galette Adapted from Fine Cooking

Ingredients for the dough:
  • 6-3/4 oz. (1-1/2 cups) unbleached all-purpose flour
  • 2 tsp. granulated sugar
  • 1/2 tsp. table salt
  • 5-1/2 oz. (11 Tbs.) cold, unsalted butter
  • 1 large egg yolk
  • 3 Tbs. whole milk
  • 1/4 tsp cinnamon
  • 1/4 tsp cardamom

Ingredients for the filling:
  • 4 cups blueberries
  • 1/4 cup granulated sugar
  • 2 Tbs. honey
  • 1 tsp. finely grated lemon zest
  • 1 tsp cardamom
  • 1/4 tsp cinnamon
  • 1 Tbs. all-purpose flour
  • Big pinch table salt
  • 1 large egg, beaten well
  • 2 Tbs. granulated sugar

Directions for the dough:
  • Combine the flour, sugar, and salt in a stand mixer fitted with a paddle attachment 
  • Cut the cold butter into 1/2-inch cubes and add them to the flour. 
  • On a low speed, mix the butter and flour until the flour is no longer white and holds together when you clump it with your fingers, this will take 1 to 2 minutes. 
  • In another bowl, mix the egg yolk and milk and then add that to the flour mixture. 
  • On low speed, mix until the dough just comes together
  • Knead the dough on a clean counter working it with the heel of your hand
  •  Wrap the dough in a sheet of plastic wrap as a flat disk, and let it rest in the refrigerator for 15 to 20 minutes (or up to four days) before rolling it out.
  • Before rolling it out, make sure you get the filling ready!

Directions for the filling:

  • Preheat the oven to 350 degrees F and line a baking sheet with parchment
  • Put the blueberries in a large bowl. Toss the fruit with the 1/4 cup granulated sugar and spices.  Add the lemon zest, honey, flour and salt, and toss 

Now it's time to combine and bake:

  • Remove the dough from the refrigerator and let it sit at room temperature for about 5 minutes. Roll the dough out and place on the baking sheet.  
  • Spoon the fruit in the center of the dough round. 
  • Using your fingertips, fold the edges of the dough over some of the fruit to create a rim about 2 inches wide. Work your way all around, pleating the dough as you go.
  • Using a pastry brush or spoon, cover the dough evenly with the beaten egg. Sprinkle the granulated sugar directly on the dough and fruit.
  • Bake the free form pie for 55 minutes, cool completely and serve at room temperature 
And there you have it! A beautifully rustic Blueberry Galette 

Keep enjoying the summer sun everyone! And get yourself to a U-Pick farm ASAP,  you won't regret it. Eat well! Be well! And subscribe below to never miss a beat :)
Thursday, July 2, 2015

Serene's Owl Cake

Hello! This week I am going to do something a little different. Instead of giving you a recipe, I'm going to give you a step by step tutorial on how to make your very own, owl cake:


SUPER ADORABLE, RIGHT? If you have the patience or a super creative cake making friend, this is an amazingly straight forward project in the kitchen. 

Enter my friend Serene:


She has been creating crazy cakes since her senior year of high school and it's a hobby that has just sort of stuck. I was her resident advisor in college - she was the kind of resident that kept me sane. Not only is she super cool, she was always down to hang out with me and watch stupid movies. We became good friends, and I always look forward to seeing her. After a recent facebook post where she showed off some wicked cactus cupcakes, I knew that we needed to see each other again. Serene is a project engineer by day and cake master by night. Let's see her process! 

I'll include links to the recipes she used for this below, but for now, prepare yourself to see some bakery magic!


Step 1: Make the 2 round cakes and 1 dome shaped cake the night before and let it cool


Two round cakes will stack on top of each other (with frosting in the middle)
The dome shaped cake will be the top (for the head of course!)

Step 2: Make the peanut butter whipped cream frosting for the middle of the cakes


Step 3: Stack the cakes using the peanut butter frosting and add chocolate chunks for flavor


Step 4: Trim the edges to make everything even and make sure you have a cardboard cake stand that is the same size too


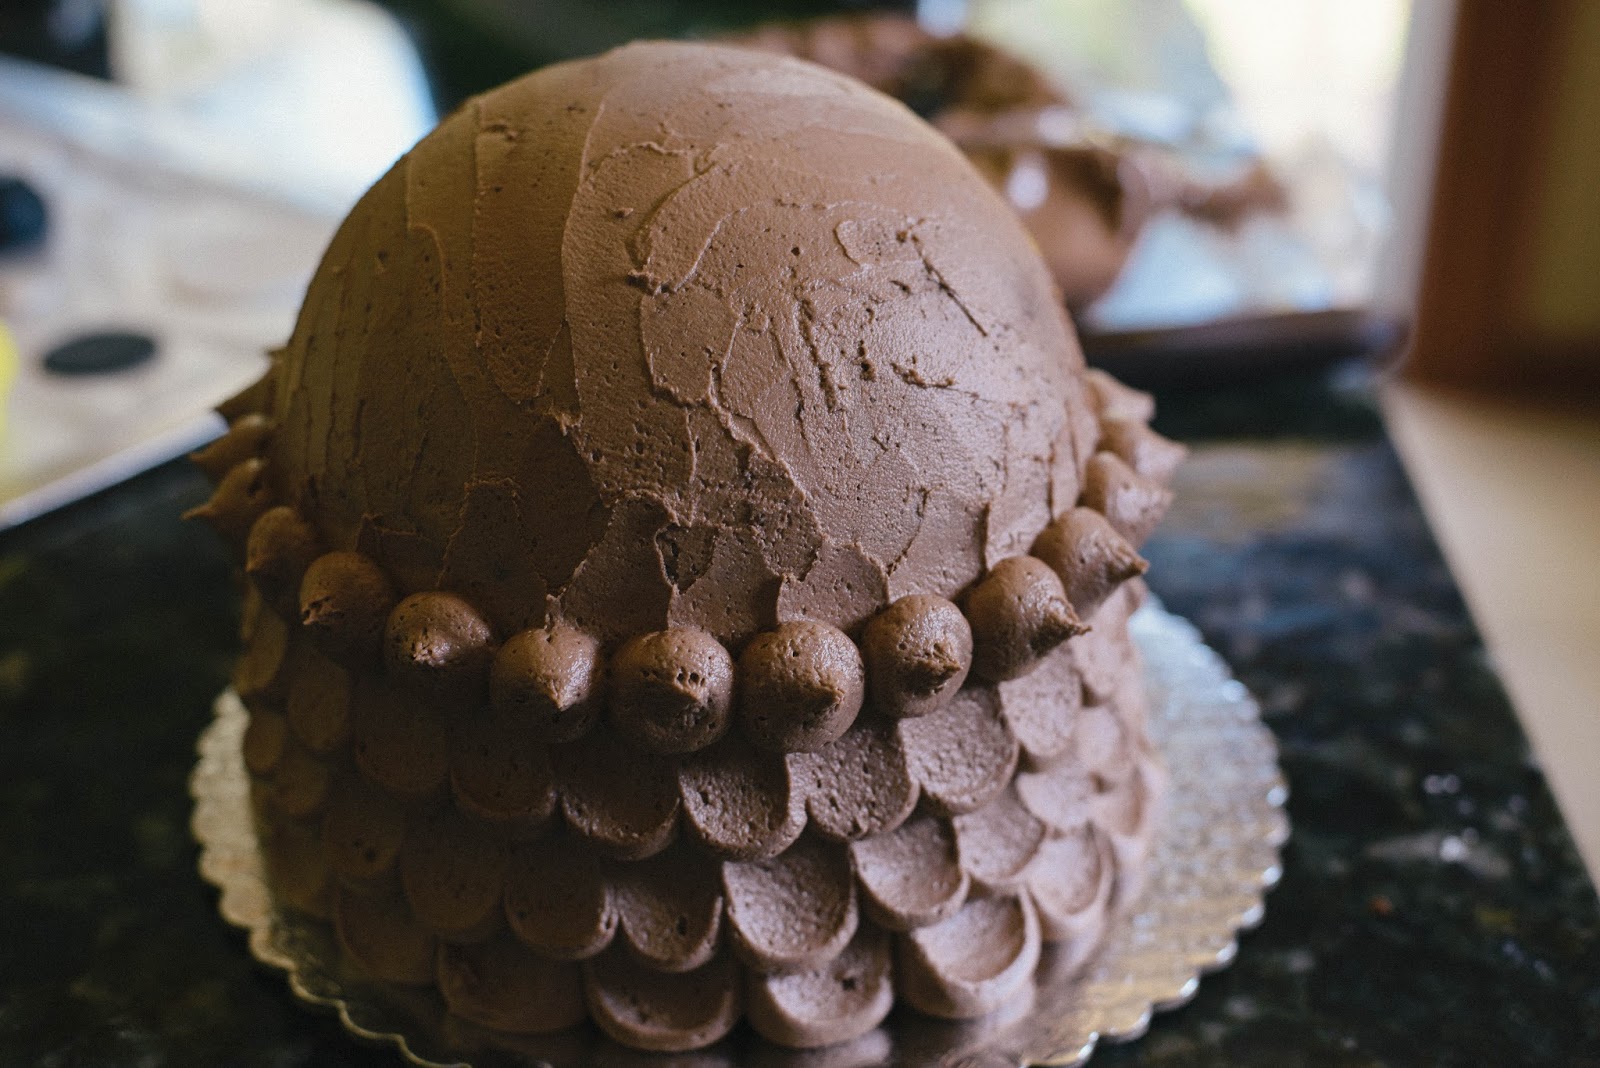
Step 5: Make the peanut butter buttercream frosting for the outside and dye it brown, since owls are brown you know..

`


Step 6: Frost the crumb layer! This means cover the cakes lightly and seal in all the crumbs. The next step will make it prettier.


Step 7: Grab the fondant, make three balls, dye them, roll them out, and using a cookie cutter make the circles for the feathers and eyes.


Step 8: Assemble the circles onto the front of the cakes to create the feathers


Step 9: Frost the cake! Make individual dots and using a flat knife, swipe up


Step 10: Add the eyes!


Step 11: Using your leftover fondant, make the beak and feet


AND THERE YOU GO! YOUR VERY OWN OWL CAKE!


SERENE'S LINKS:


For the buttercream: 
http://joyfullyhome.com/2014/04/owl-cake-tutorial/

For the whipped cream frosting: http://divascancook.com/peanut-butter-cake-recipe-peanut-butter-frosting-easy/  

For the full OWL tutorial: http://joyfullyhome.com/2014/04/owl-cake-tutorial/


Eat well! Be well! And subscribe below for more food adventures from me and my friends :)

Monday, June 22, 2015

Samosas + Mint Chutney

Some people come into your life and spark your sense of wanderlust. Enter Laurel - my world traveling friend. She is taking a gap year to take on the world and see what's next. After two years working as a manufacturing engineer in Arizona, Laurel has been wondering around South East Asia since December getting to know new people and volunteering in various cities. She's stayed in hostels, in homes with families, and along trails while trekking her heart out. 

She was in Nepal in May when the earthquake hit, and she then decided to make room for trained volunteers to help out and regroup. So for Mother's Day, she used her travel insurance, hopped a plane and surprised her mom by coming home for the summer. While she is home, she is catching up with her family and friends and making plans for the next part of her journey to South America.

She came over one night to visit with me and Ethan. After hearing about all the good food she experienced, we got motivated and decided to make Samosas! 


Samosas are a popular entree appetizer or snack in the local cuisines of Indian subcontinentSoutheast AsiaCentral Asia and Southwest Asia, the Arabian Peninsula, the Mediterranean, the Horn of Africa and North Africa. They are a fried or baked pastry that are usually filled spiced potatoes, lentils, onions, peas, and or minced meat. 

It's a labor intensive process to make these tasty bites, but grab a few of your closest friends and you'll feel like you're having a party! Pair it with this minty chutney, too and you'll find yourself transported to a different continent. 

Check out more of Laurel's adventures here. And read on for the recipe! 

SAMOSAS and MINT CHUTNEY- INGREDIENTS

For the beef filling:
  • 2 pounds ground beef
  • 1 onion, finely diced
  • 1 lemon, juiced
  • 1 tsp + 1 tablespoon cumin
  • 1 tsp coriander powder
  • 1 tsp garam masala
  • 1 tsp tumeric powder
  • 1 bunch fresh coriander (if you can find it!)
  • 1 tsp garlic paste
  • 1 tsp ginger paste
  • 4 oz canned green chiles
  • Salt to taste 

For the wraps:
  • It's probably best to buy pre-made wraps, but you can make your own too
  • 3 cups flour
  • 2 tsp salt
  • 1 cup water
  • Vegetable oil for frying
For the mint chutney: 
  • 1.5 cups chopped cilantro
  • 1.5 cups fresh mint, chopped
  • 1 green chile pepper
  • 1/2 tsp salt
  • 1 medium onion, chopped
  • 1 tablespoon lemon juice
  • 1/4 cup water

DIRECTIONS
  • In a big bowl combine the ground beef, onion, chiles, ginger, garlic, the spices, half of the coriander and lemon juice. Make sure the ground beef is very lean. 
  • Heat 1 tablespoon oil in a large pan over medium heat and cook the beef mixture until completely browned and dry. Stir it constantly so you don't make lumps. It should look something like this.
  • While making the beef, get a couple other people on wrap duty.
  • For the wraps: combine all the ingredients and knead until the ball is really firm. Cover and let it rise for about 15 minutes. Then divide it into 6ish equal balls. 
  • Roll out the balls into a thin dinner plate sized circle. 
  • Once the meat is ready, get the individual wraps and shape them into a cone. Fill the cones with the meat mixture. 
  • Get a dutch oven or deep soup pan and fill it with 1.5 cups vegetable oil over medium high heat. 
  • Then, with the filled wraps get them in the oil!
  • Fry them on each side for about 5 minutes. When cooked, place on paper towel to drain and cool.
  • For the mint chutney: combine all the ingredients in a blender and puree! 


AND ENJOY :)


And per usual, eat well! Be well! And subscribe below by email to never miss a beat.