Sunday, October 11, 2015

Falling into Autumn -- Spicy Chocolate Chocolate Chip Cookies

Some people really love their pumpkin spice when the leaves starting turning colors. I don't quite know what it is, but let me tell you - there is so much more to life than pumpkin spice! As for me, I have always been a huge cinnamon fan. And recently, I have been opened to the world of cardamom. Put these two together and you've got an unbeatable combo!

With the cooler weather, slowly trickling in, the days are getting shorter and soggier. You have a day off, and what sounds better than some warm cookies and a good movie? Add a blanket and you've got the workings of a perfect day. 


Oh, and did I tell you I make the BEST cookies around? They were my speciality back in college.  I found one recipe and have reworked it over the years, adding my own favorite flavors, mixing it up for different styles - you know, the usual!

Well here's one variation of the best cookie recipe around to help you settle into Autumn and WOW your friends. Here are my Spicy Chocolate Chocolate Chip Cookies. And when I say spicy...I mean spice! Not hot!

Get that butter and those eggs to room temperature! And enjoy!

INGREDIENTS

  • 2 cups chocolate chips

DRY - in a medium bowl
  • 2 cups flour
  • 3/4 cup dutch cocoa 
  • 1 teaspoon baking soda
  • 1 teaspoon salt
  • 2 teaspoons cinnamon
  • 1/2 teaspoon cardamom
  • 1/2 teaspoon nutmeg
WET - in a large bowl
  • 1 egg (whole)
  • 1 egg yolk
  • 1 cup butter (2 sticks)
  • 1 cup brown sugar
  • 1/2 cup white sugar 
  • 1 tablespoon vanilla


DIRECTIONS
  • Preheat the oven to 325 degrees F
  • Line a large baking sheet with parchment paper
  • In a medium bowl, combine all of the dry ingredients. Use a whisk to combine. 
  • In a large bowl, combine the butter and the sugars using a mixer on high speed. Whip them together for about 1 minute until the butter and the sugar look fluffy.
  • To the butter and sugar mixture, add the eggs and vanilla. Stir slightly, until just combined.
  • To the wet ingredients, add the dry ingredients in portions. You don't want flour going every where! 
  • Once the wet and the dry ingredients are combined, using a spoon, add the chocolate chips. 
  • Using a cookie scoop, spoon, or 1/4 cup measure, scoop out the dough onto the baking sheet.
  • Cook for 12-14 minutes. Cool. And eat them all up.

Subscribe by email below, and never miss a beat!
-Karen

Sunday, September 27, 2015

IPA Slow Cooker Chicken

Like I've said a million times, Ethan and I moved recently. This one felt like a big one to us. I moved into our Seattle basement while he was still finishing up an internship in Utah. So this move to Sammamish was the first time we were moving our stuff together at the same time to the same place. It felt very grown up. I got rid of a lot of my stuff before the move to help balance out space usage. And I got really into it! I don't know why, but donating and throwing away the things that I just didn't use any more felt very freeing. 

So anyway, when we moved in to the Sammamish house in the sky, I felt like everything we had in the place was exactly what we needed. But then I noticed these 2 IPAs in our fridge that had gone unopened since May. Ethan had been drinking one during the move, but didn't finish it. So I asked him if he liked it. He did not. 

I hate IPAs. Literally. I am not a real PNWer for saying this, but I truly think the taste latches onto your taste buds and takes the taste of anything else you are ingesting away forever. Long story short, these two fridge space hogs had to go. And I needed a new slow cooker recipe. And boom! It hit me. Goodbye yucky IPA! Hello delicious, moist, new chicken recipe!


INGREDIENTS
  • 4 chicken breasts
  • 1 onion, sliced
  • 2 garlic cloves, minced 
  • 2 bottles or 24 ounces IPA beer
  • 1/2 cup sweet chili dipping sauce
  • 2 tablespoons apple cider vinegar
  • 1 teaspoon chili powder
  • salt and pepper to taste
DIRECTIONS
  • Put all the ingredients into a slow cooker and set on low
  • Cook for 8-10 hours
  • Serve over rice or lettuce, add siracha or hot sauce for an extra kick!

Sunday, September 20, 2015

Fresh Zucchini Waffles


It's Saturday morning. Growing up, I'd wake up early, turn on some Saturday morning cartoons, and go to the kitchen. There I would find my dad rummaging through the cupboard, and prepping the counters with bowls and ingredients. He was in charge of pretty much everything, but I was the master stirrer of the dry ingredients and the homemade maple syrup.

Saturday mornings only meant one thing in my house: waffles. 

This morning, I woke up in a new house. 
I have a new kitchen and a fridge full of groceries, thanks to wonderful friends and family. So for my first Saturday in my new home, I thought it would only be fitting to make some waffles using my dad's recipe. But of course, I added a twist! Ethan's mom's garden has bloomed in the hot Seattle summer, and along with a dozen pears and apples, she gave us two huge zucchini. So I thought to myself, "Zucchini Waffles would be good."

And boy, they sure were. Soft in the middle, crunchy on the outside. Slab on some peanut butter and a little bit of syrup, and you've got yourself one special breakfast.


INGREDIENTS
  • 1 small zucchini (or 1/2 of a large one), grated & drained
  • 1.75 cup flour
  • 1 tablespoon baking powder 
  • 2 dashes salt 
  • 2 teaspoons cinnamon
  • 1.75 almond milk
  • 0.5 cup vegetable oil
  • 3 eggs, yolks and whites separated 
DIRECTIONS
  • Using a cheese grater, grate your zucchini. Place it in a strainer and set something heavy on top of it. Let the zucchini drain for about 30 minutes. 
  • Get your waffle maker heating on high. Make sure to spray it with some non-stick spray!
  • Separate the egg whites, beat them until they turn white and start to form peaks. 
  • In a separate, large bowl, mix together the egg yolks, oil, and milk
  • In a medium bowl, mix together the dry ingredients. 
  • Add the dry ingredients to the yolk, oil, milk mixture. Mix until almost smooth. You want lumps! Then add the grated zucchini.
  • Finally, to the large bowl, add the egg whites slowly and fold them in. Do not over mix. Your batter should look bubbly. 
  • Once your waffle maker is ready, use a 1 cup measure and spoon in the batter. Cook until golden brown!
Enjoy!
And subscribe by email below for more fun :)


Tuesday, September 15, 2015

Southwest Quinoa Salad

Well, I’m back people and ready for action. I know it’s been a little while, but if you have read my last couple posts, you’ll know I’ve gone through some changes these past couple months. Luckily, I’m all settled into my new apartment, watching Gilmore Girls, and wasting no time in the kitchen. As I type, I have an amazing David Lebovitz pear cake in the oven.

Check it out!
But there's more to this story... we're here for some quinoa!

We now live on the top floor; the kitchen is twice as big and a million times lighter than the basement cave in Seattle. It’s a dream come true for me! Anyway, I took a couple days off work to get settled. Ethan is, unfortunately, way behind at work. So last night, we recreated one of our old dates. When Ethan was in grad school, the only time I could really see him was at dinner. So while he studied, I cooked, and for the amount of time it took to eat, we got to have some real face time. And so, I made a makeshift picnic and brought dinner to him at work.

I needed something that would be easy to carry, not need a lot of utensils, and packed with protein and veggies to keep Ethan burning the midnight oil. And so we ate this awesome Southwest Quinoa Salad over a patient table while the Vikings/49ers game played in the background. Romance at it’s finest if I do say so myself!

This grain salad is easily packed for a lunch, made into a vegetarian meal, or a great dish to bring to a potluck. I’ve modified the recipe to meet Ethan’s meat needs, you can find the original recipe in Wendy Polisi’s cookbook, The quintessential quinoa cookbook. Thanks Wendy! (And thanks #bae for getting it for me!)


INGREDIENTS:
  • 1 ½ cups roasted chickpeas (drain & rinse them first!)
  • 1 cup corn (fresh is best!)
  • 1 red pepper, seeded and diced
  • 1 yellow pepper, seeded and diced
  • 2 tablespoons taco seasoning
  • 2 tablespoons JOES seasoning (or chili powder)
  • 2 tablespoons lime juice
  • 2 tablespoons soy sauce
  • 2 cups cooked quinoa
  • 1 pound ground beef, cooked
  • 1 large tomato, seeded and diced
  • 1 green chile pepper or jalapeno, seeded and diced
  • 2 tablespoons cilantro
  • 2 tablespoons lime juice
  • 1 teaspoons agave nectar


DIRECTIONS
  • Cook the quinoa (good trick is to use your rice cooker!)
  • Preheat the oven to 400 degrees F
  • Combine the chickpeas, corn, red & yellow peppers, seasonings, lime juice, and soy sauce and place on a baking sheet lined with parchment paper.
  • Roast chickpea mixture for 45 minutes, stirring often so as not to burn veggies
  • Cook the ground beef with some Joe’s and garlic powder until there is no pink. 
  • In a large bowl, combine the lime juice and agave nectar. Add the quinoa, beef, tomatoes, chile pepper, cilantro, and chickpea mixture and toss!
  • Top with cojita cheese or feta and you are in for one delicious meal :)

Sunday, August 30, 2015

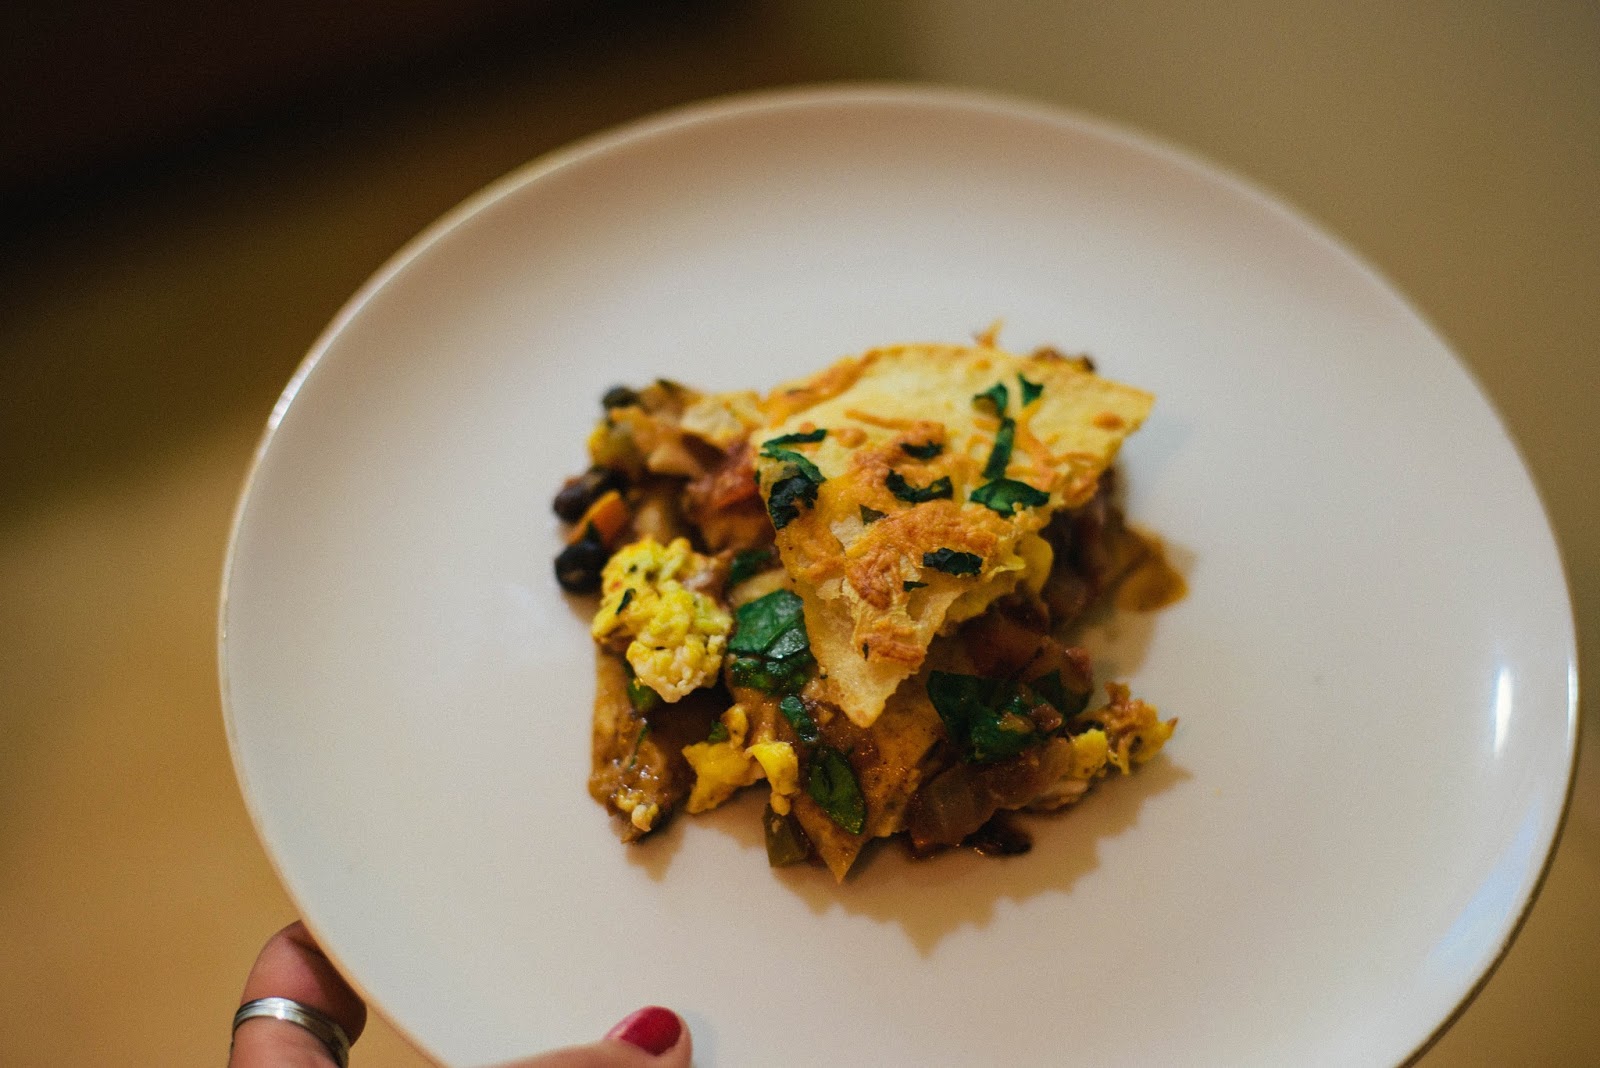
Span"ish" Egg Bake

Oh, my dear friends. I miss you! So here's what has happened this summer:
  • I turned 25
  • I quit my job
  • Ethan and I participated in our 2nd triathlon together (my 3rd total)
  • I started a new job
  • We are moving back to the east side in two weeks
As you my surmise, the blogging has gone by the wayside a little. And boy have I missed it. Luckily, I have a lot of ideas stewing, a bigger kitchen to look forward to, and many more friends to introduce you to! Bare with me as I finish out some things this summer. My blogging may be a little sporadic until I find my new normal again.

Welcome to my Span"ISH" Egg Bake. An idea that has been baking in my mind for a few weeks, but I just haven't had time to test it out. It's part American casserole and part Mexican breakfast chilaquiles. AND ALL TOO DARN DELICIOUS. This the epitome of wholesome cooking in my book. Great flavors and nutritious ingredients combined into one mind blowing bite. ENJOY!


INGREDIENTS
  • 4 eggs, scrambled 
  • 1 tablespoon butter
  • 1/2 onion, diced
  • 1 bell pepper, diced
  • 1/2 cup black beans
  • 1/2 cup salsa, chunky!
  • 3 large tortillas (corn or flour)
  • 1/2 cup cheese, grated
  • 1 cup fresh spinach, chopped
  • Salt & Pepper, to taste
  • 1 clove garlic, minced 
  • 1 tsp chile powder
  • 2 tsp dried oregano 
DIRECTIONS
  • Sauté onion and peppers with spices and garlic 
  • Scramble the eggs and add a dash of oregano 
  • Melt the butter in a pan over medium heat, lower the heat to medium low, and cook the eggs
  • Preheat your oven to 400 degrees 
  • Grab a pie dish and spray with cooking spray 
  • Once the eggs are done, your vegetables are chopped, start layering your ingredients
    • Tortilla
    • Onion / pepper 
    • Beans
    • Salsa
    • Eggs
    • Spinach
    • Cheese
    • Repeat 1 more time and top everything with the final tortilla and remaining cheese 
  • Serve with sour cream, hot sauce, extra salsa on a slow Sunday morning and enjoy :)

Thursday, August 20, 2015

Semi Homemade Baked Burritos


When you start a blog, you read a lot of other blogs about how to write a blog. How to gain followers, when and how often you should post content, how to find your voice... etc... So when you start writing, you make a plan to push out your best content on a regular basis. 

But sometimes, life throws a curveball at you. For the last two months, I have been looking for a new job, finding a new place to live, gaining a new job, and going through training. It's nuts! And for me, all of this change has put a real strain on my creativity and my ability to post regularly. Luckily, I'm seeing the light at the end of tunnel and I feel my energy coming back. Hooray!


But here's the conclusion I have come to, you and the rest of the world have the same days like me. You come home, you're tired, you can barely think, and it takes you everything NOT grab the car keys and eat out. On days like these, you CAN still make a wholesome meal at home with very little effort. 

Enter the semi-homemade baked burrito: 
- I had chicken already cooked, but you can use any left over meat *
- I always have beans, tortillas, and cheese on hand
- I also had a little left over southwestern salad dressing to top it off with something special


INGREDIENTS:

  • 1 or 2 tortillas, depending on how much you stuff in it
  • A handful of shredded cheese
  • 3 spoonfuls whole black beans
  • 1/4 cup diced chicken, cooked*
  • 1/2 tomato diced 
  • 2 tablespoons creamy salad dressing (optional) ... salsa would work well too!
  • 1 teaspoon olive oil
DIRECTIONS
  • Preheat the oven to 425 degrees F
  • Grab all your ingredients and pile them into the tortilla(s)
  • Place your burrito on a baking pan and lightly sprinkle oil on top
  • Bake for 12-15 minutes until lightly brown and you can hear it bubbling 
  • Top with the salad dressing and enjoy!
  • Serve with guacamole, a side salad, fruit, veggie, etc

So there you have it; a filling meal without too much effort! Enjoy!


Tuesday, August 11, 2015

Fast Chicken Piccata

Last week was a doozy. In the midst of job searching, job interviewing, I still need to keep up with my current position. And yes, my current employer knows I am doing all this. It is an amicable departure. But nonetheless stressful!

I took a vacation day for an interview I had last week. Mind you the interview was only 30 minutes, but it was an hour away. So I was determined to make the most of it! I went to Target and got two new books. I went to the movies and saw Trainwreck. And then I walked around Trader Joe's, wondering what lovely meal I could make later that evening. I had the time and I wanted to do something I had never done before on my own. 

And then it hit me! Chicken Piccata. 


Lemony, tangy, rich, and delicious, this Mediterranean entree is super quick and will delight anyone at your table. It sure surprised Ethan!

Here's what you do....


INGREDIENTS
  • 2 chicken breasts, lightly pounded
  • Salt & pepper
  • Flour, for dredging
  • 4 tablespoons butter
  • 2 tablespoons olive oil
  • Juice of two lemons
  • 1/2 cup chicken stock
  • 1 small jar of capers, drained
  • Fresh parsley 
DIRECTIONS
  • Cover a cutting board with plastic wrap. Set the 1 chicken breast at a time on the board and cover with plastic wrap on top. Using a heavy bottom glass or the smooth side of a meat tenderizer, pound the chicken so that it is 1/2 inch thick throughout. 
  • Season the chicken with salt and pepper. Then dredge it in flour. 
  • In a large skillet, heat 2 tablespoons of butter and 3 tablespoons oil. When it starts to sizzle, add the chicken. Cook on one side for 3 minutes and flip.
  • If browned, turn the chicken over and cook for another 3 minutes.
  • Remove and transfer to a plate with paper towels on it. 
  • While the chicken is cooking, combine the lemon juice, chicken stock, and capers. Whisk together.
  • Once the chicken is removed from the pan, add the lemon juice, chicken stock, and capers to it. Bring the broth to a boil, and scrape the bottom to remove the brown bits. You're deglazing now!!
  • Return the chicken to the pan, and simmer for 5 minutes. 
  • Remove the chicken, and then add the remaining 2 tablespoons of butter to the broth. Whisk fast and then pour over your chicken.
Serve on a bed of greens or noodles and enjoy!
Eat well! Be well! And subscribe below to never miss a beat.